Calendar Filters - Mobile Interface
 Updated
This article is part of a series that explains how to view and interact with the schedule—commonly referred to as the calendar. For easy reference, here are links to the entire series:
- Calendar Overview
- Calendar: Date Range
- Calendar Views
- Viewing the Calendar—Filters
- Calendar: Shift Details
- Customizing Calendar Views
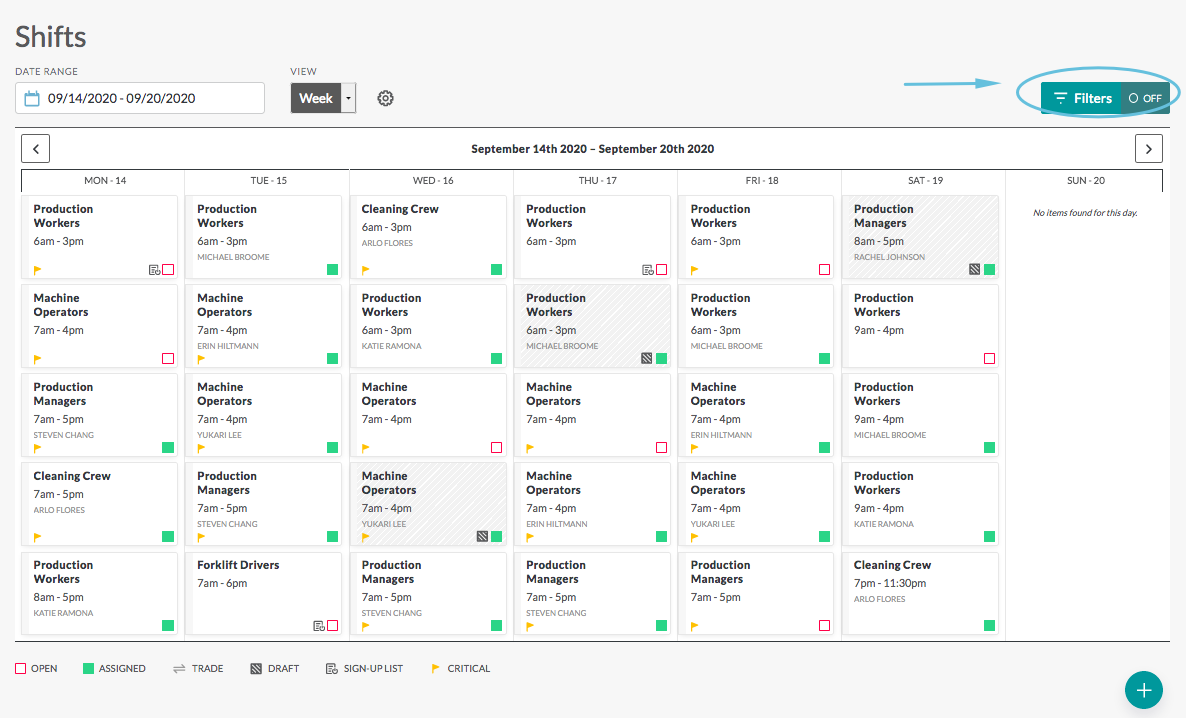
This article explains how to use the filters. With filters you can focus the information displayed on your calendar. You can limit the view by workgroups, roles, person, and much more. For example, here is the calendar with no filters applied:
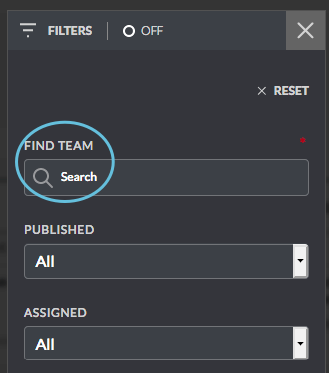
Choose a filter:
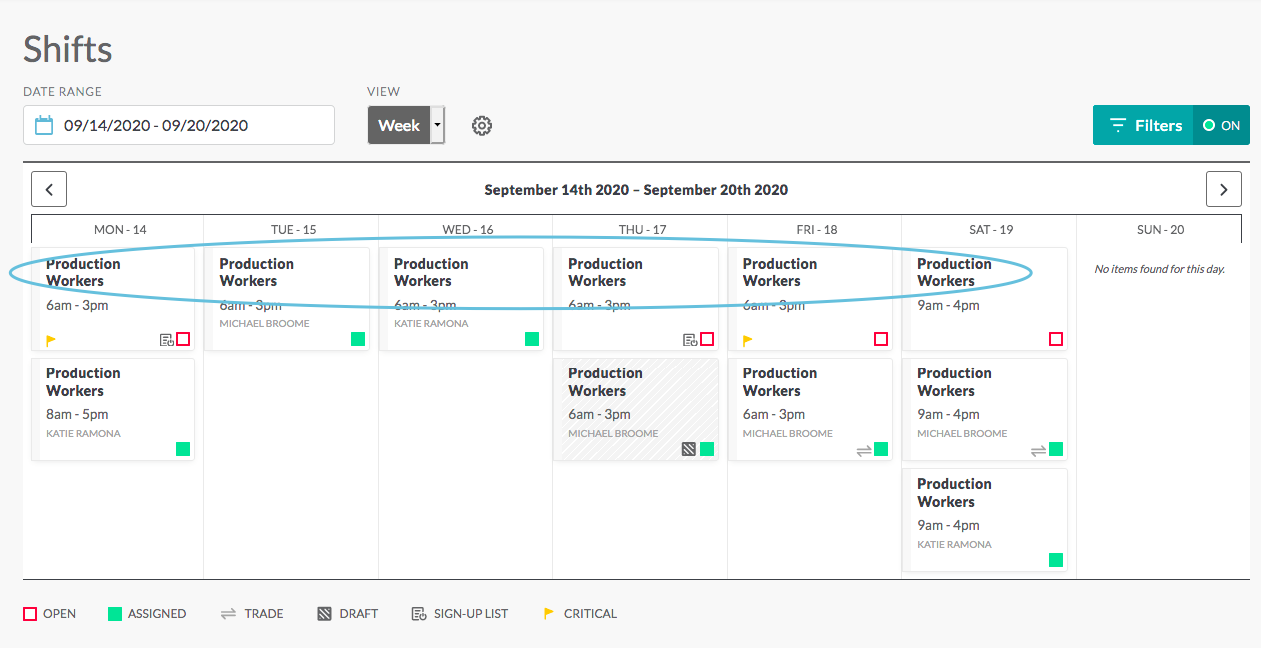
Calendar with Find Team filter applied:
Using Filters
Begin by clicking on Filters from the calendar::
Pick the option(s) to filter by and click Apply. The view will be updated to show only shifts that meet the filter criteria selected:
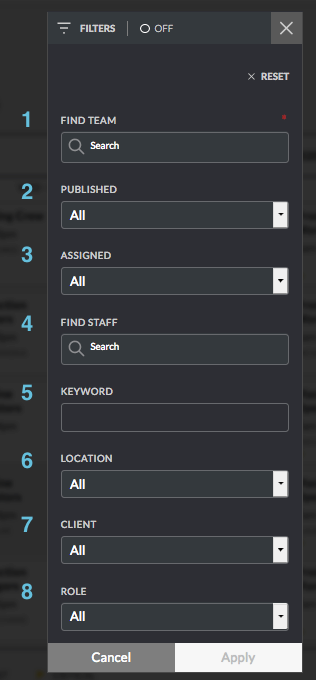
Available Filters
Note: Not all filters are available to all users.
- Find Team—Choose from a drop-down list of available workgroups. Note: if your workgroup name is not Team, you will see your workgroup name.
- Published—Choose from All, Draft, or Published
- Assigned—Choose from All, Open, Assigned, Unacknowledged, Acknowledged/Declined
- Find Staff—Choose from the drop-down list or type in the Search field to find a specific person
- Keyword—Type into the search box to filter by keyword
- Location—Choose from a drop-down list of available locations
- Client—Choose from a drop-down list of available clients
- Role—Choose role from the drop-down list.
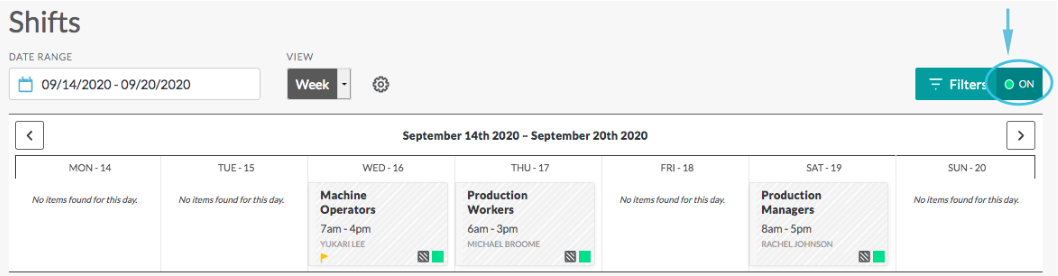
Filter “On” Switch
Once a filter is selected, an indicator automatically moves to the On position to show that a filter has been applied:

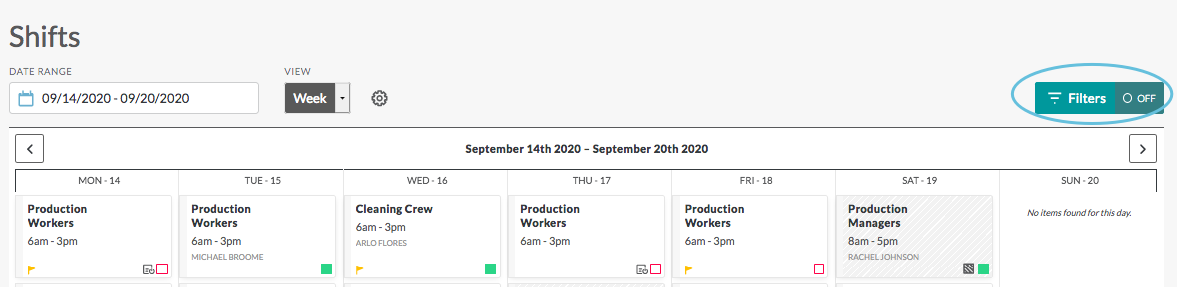
The Filter indicator is also visible on the calendar as a visual reminder that filters have been applied to the view being displayed:
Removing Filters
Click Clear in the Filter dialog box, then click Apply:
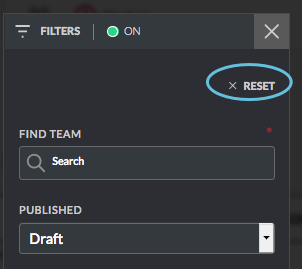
Once your filters are cleared, the On/Off toggle automatically switches back to Off: