Add Shifts - Mobile Interface
 Updated
The Add Shifts tool is an easy way to create single or repeating shifts.
Add a Shift
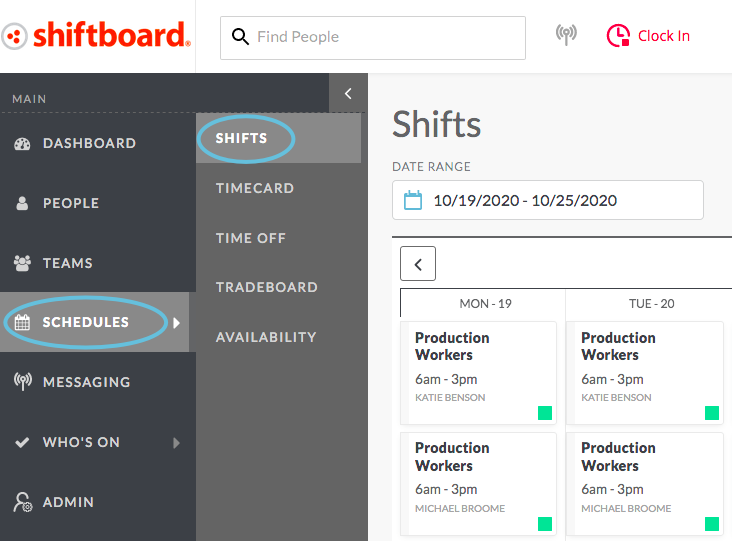
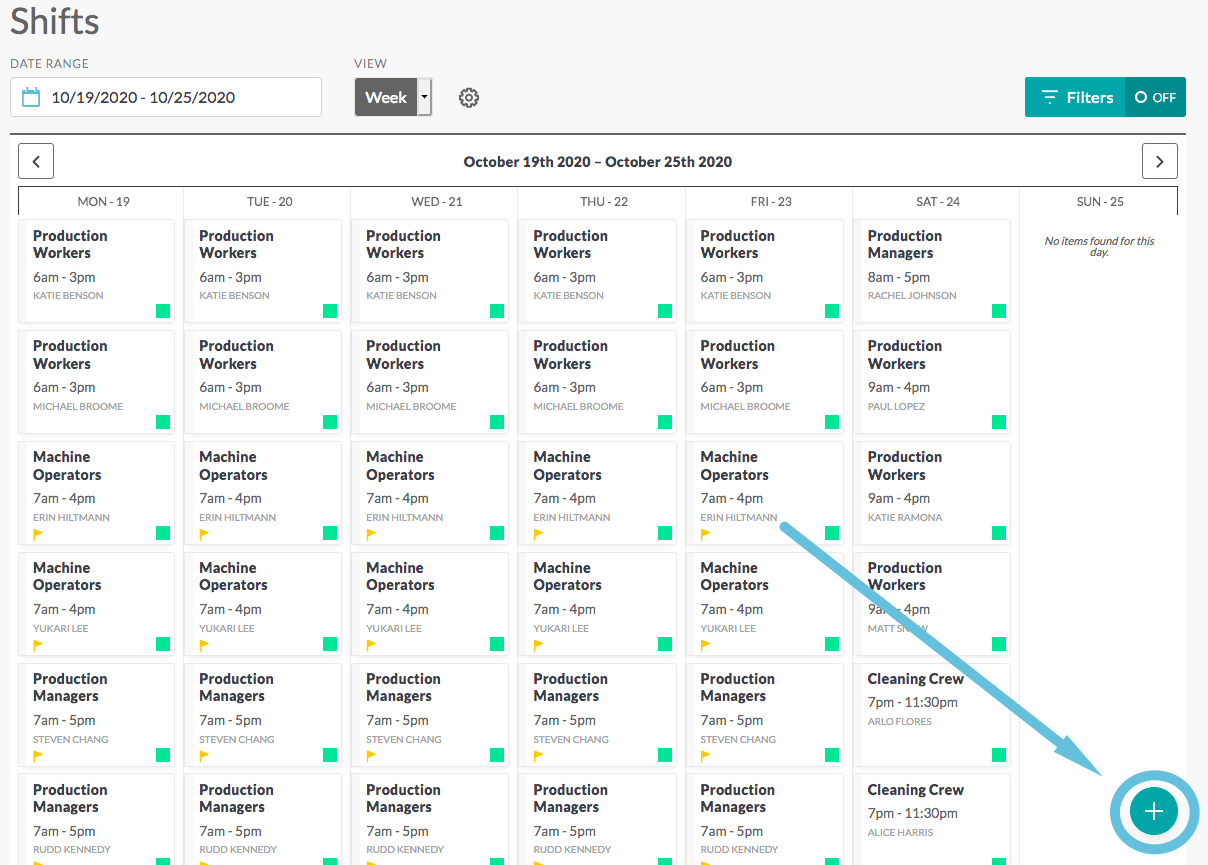
To add a shift, navigate to the calendar (Schedules > Shifts) and click the plus sign in the lower right corner of the screen.
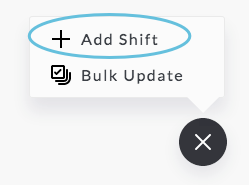
Select Add Shift from the menu to open the Add Shift page:
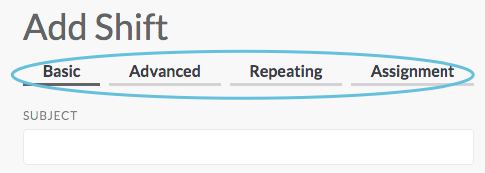
The Add Shift page has four tabs across the top—Basic, Advanced, Repeating, and Assignment. Each tab is explained below. The screenshots in each section are numbered to correspond with explanations below each image.
Basic
The Basic tab includes all required fields and many commonly used fields. Required fields include a red asterisk (*) above the field.
Note: The fields on the Basic tab are determined by site settings, so your page may not exactly match the example screenshot.
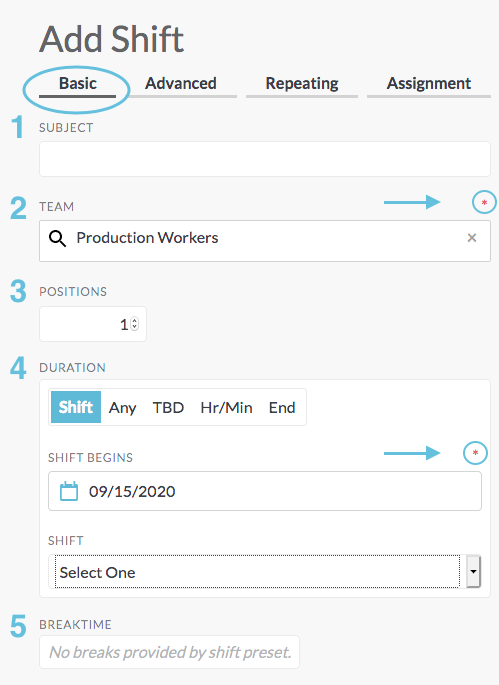
- Subject: Additional optional information about the shift to view at a glance.
- Team: Choose from the drop-down list. This is a required field and each shift can only be associated with one team (workgroup). Note: if your workgroup name is not Team, you will see your workgroup name.
- Positions: Select how many individuals or positions are needed to work this shift. The default is one position.
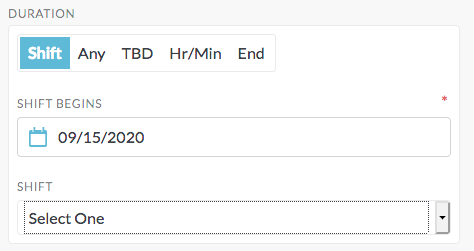
- Duration: This selection determines the information about the shift duration and the nature of shift.
- Shift: The Shift tab allows you to choose from pre-set shift/coverage blocks, which are configured in the site settings. Common examples of pre-set shifts are Morning, Swing, and Night. The Shift tab will always be visible, but only sites with pre-configured shifts will be able to choose from a list of shift blocks:
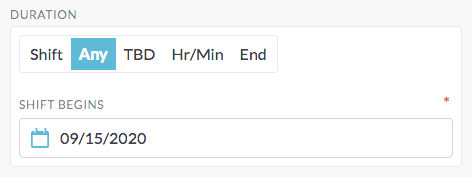
- Any: This shift is needed at any time on a particular day:
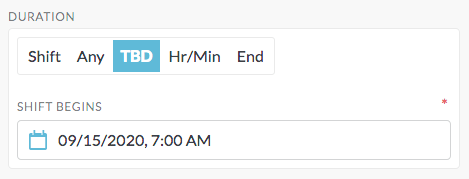
- TBD: These types of shifts are task-based shifts, where the individual will arrive at a certain time, but may leave when the task is complete:
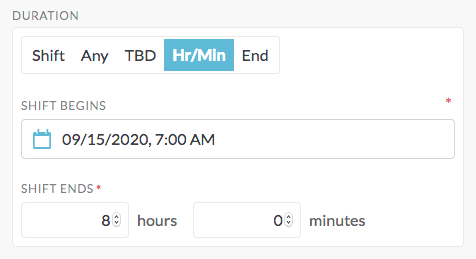
- Hr/Min: Sets a specific start time, and plug in the duration of the shift:
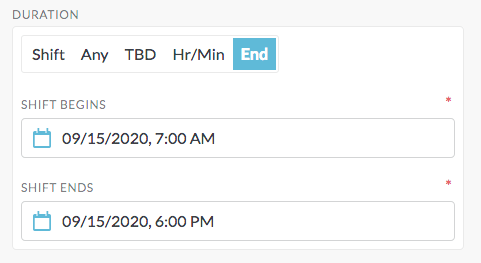
- End: Traditional approach to shifts where the shift has a start and end time:
- Shift: The Shift tab allows you to choose from pre-set shift/coverage blocks, which are configured in the site settings. Common examples of pre-set shifts are Morning, Swing, and Night. The Shift tab will always be visible, but only sites with pre-configured shifts will be able to choose from a list of shift blocks:
- Breaktime: Allows you to set breaks, including naming the break, identifying whether it is paid, and setting start time and duration.
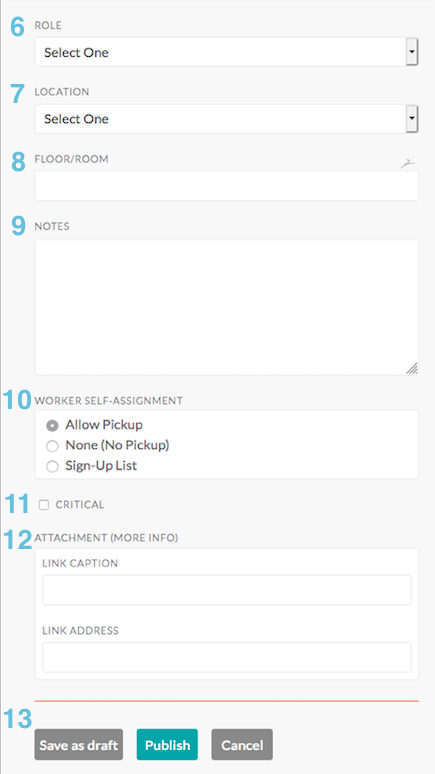
- Role: If roles are established within the workgroup, choose from the list if this shift needs to be filled by a particular role.
- Location: The location of information for the shift such as a company or address.
- Floor/Room: Share details on a particular room, floor, or area where this shift will take place.
- Notes: Additional optional information about the shift.
- Worker self-assignment: Within the calendar, shifts can be created with different assignment preferences.
- Allow Pickup: Individuals of the selected team will be able to view open shifts and take the shift themselves on a first-come, first-serve basis.
- None (No Pickup): Selecting this option means that open shifts are only visible and assignable by coordinators and managers.
- Sign-Up List: Allows individuals to express interest in working this shift. Assignments are then selected by the manager from the sign-up list.
- Critical: Places a flag icon on this shift to signal urgency and/or importance.
- Attachment (more info): Documents uploaded to the Filebox may be shared as an attached link in this space.
NOTE: Only one document can be added per shift. - Action buttons: Select how to share this newly created shift(s) on the calendar.
- Save as draft (unpublished): This places the shift on the calendar as a draft shift and is only viewable by managers and coordinators. The shift can be published at a later date.
- Publish (post): This publishes the shift on the calendar. After you click Publish, you have the option to add a note and Notify Assignee, which will send a message to the person assigned to the shift.If your site settings allow pick-ups, then people will be notified that the shift is available for pick-up. If sign-up lists are enabled on your site, then people will be notified that they can add themselves to the sign-up list.
- Cancel: This cancels adding the shift to the calendar.
Advanced
The Advanced tab expands on the Basic tab, offering additional fields:
Note: The fields on the Advanced tab are determined by site settings, so your page may not exactly match the example screenshot.
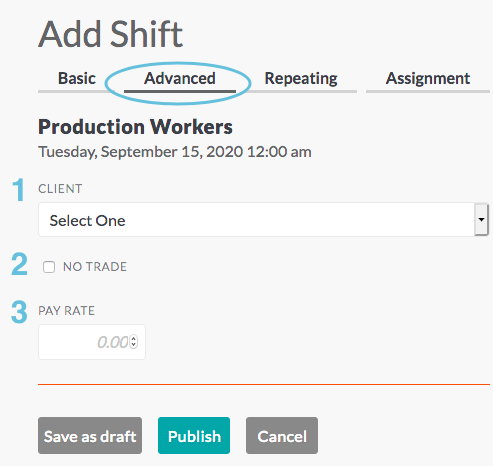
- Client: Choose a point of contact or client to associate with the shift.
- No trade: When creating new shifts, managers may override the Tradeboard default setting (this will be either “no trade” or “allow trades”).
- Pay rate: Set the hourly rate for this shift.
Working with the Shiftboard team, custom fields can be added to this screen to provide and track more information on the specific shift.
Repeating
The Repeating tab allows you to set shift repetition patterns through a certain date using the options available:
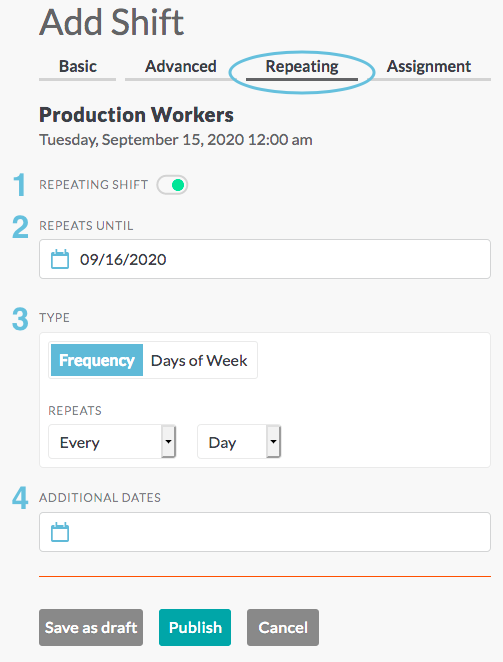
- Repeating shift: Click or slide to display fields for setting up a repeating shift.
- Repeats until: Choose an end date.
- Type: Set the pattern for the repeating shift.
- Additional dates: Add additional unique dates that may exist outside the pattern established in the Type field.
Assignment
The Assignment tab allows you to assign this shift. Depending on your workflow, it may make sense to skip over assigning people to shifts from this screen. See Assigning Shifts to learn about alternative ways to assign people to shifts.
NOTE: If you are creating multiple shifts (Basic tab > Positions), you must first create the shifts before you can assign the shifts to people on your team. To assign multiple shifts, see Bulk Update.
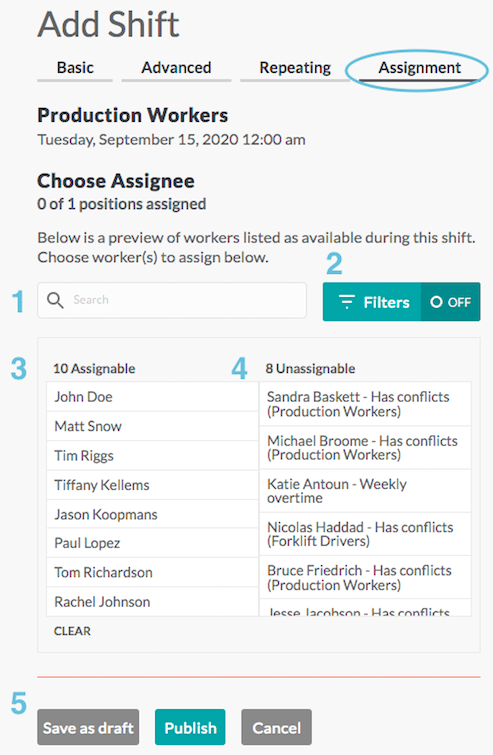
- Search: Search for a person by name. Start typing the name and matches will show in the search drop-down list. When you select the person you want from the search drop-down, then they become selected (highlighted) in the Assignable list. When you click Publish, the shift will be assigned to that person.
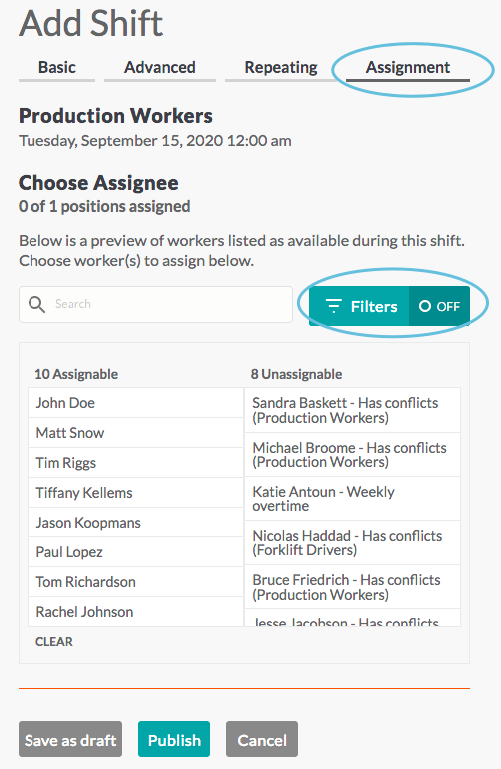
- Filter: Use filters to change the list of assignable people based on conflicts, overtime, and availability (see Using Filters section below).
- Assignable: Select a person from the Assignable list to select them for assignment to the shift or group of shifts.
- Unassignable: Lists the people who are not assignable due to conflicts.
- Action buttons:
- Save as draft (unpublished): This places the shift on the schedule as a draft shift.
- Publish (post): This publishes the shift on the calendar. After you click Publish, you have the option to add a note and Notify Assignee, which will send a message to the person assigned to the shift.If your site settings allow pick-ups, then people will be notified that the shift is available for pick-up. If sign-up lists are enabled on your site, then people will be notified that they can add themselves to the sign-up list.
- Cancel: This cancels adding the shift to the calendar.
Using Filters to Change the Assignability List
When assigning shifts, use the Filter to change the list of assignable people. You can filter by permission level, change the profile, override conflict checking, and more:
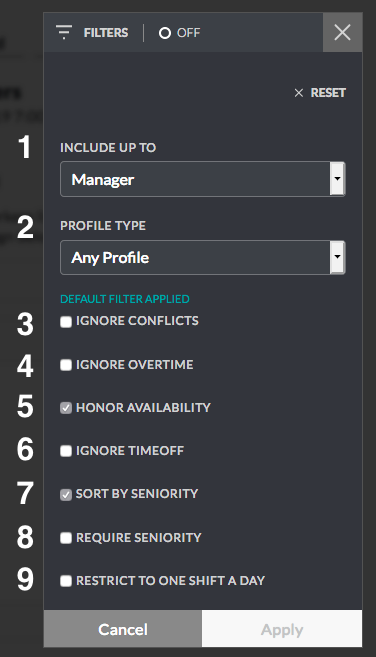
- Include up to: By selecting from the drop-down options, you can choose which people to include in your assignable list. You can include up to:
- Worker (only workers/talent)
- Coordinator (workers/talent and coordinators)
- Managers (everyone including managers)
- Profile type: This drop-down allows you to filter the assignable list based on the profile type.
- Ignore conflicts: Shiftboard defaults to showing people who are available for a shift (this prevents double booking). However, there are instances when you may need to double book someone. By checking Ignore Conflicts, you override the default setting.
- Ignore overtime: There are instances where you may need to allow overtime. By checking Ignore Overtime, you can override the default setting.
- Honor availability: For every site, Shiftboard assumes that either everyone is available for work or busy, which is determined by site setting. Each person can then change their availability to contradict the site setting:
- If the site setting assumes everyone is available for work, then individuals can set times that they are busy.
- If the site setting assumes everyone is busy, then individuals can set times that they are available. Important: In this case, people must proactively enter the times they are available, otherwise, they will not show up in the Assignable list.
When enabled, the Honor Availability filter checks this information, and includes only people who are available in the Assignable list.
- Ignore time off: When this filter is enabled, then people with approved time off will be listed as assignable.
- Sort by seniority: When this filter is enabled, then people will show up in the assignable list in order of their hire date.
- Require seniority: When this filter is enabled, only people who have a hire date associated with their account will show up in the assignable list. This setting allows managers to assign shifts to people with higher seniority.
- Restrict to one shift a day: Selecting this option will limit the availability list to people who are not already working shifts that start on this day.