Bulk Update : New User Interface
 Updated
Overview
When you need to make the same change to a large number of shifts, it’s more efficient to make those changes in bulk rather than edit each shift individually.
This article explains how to make bulk updates. If you need to edit a single shift, see Edit Shifts.
Bulk update
The Bulk Update tools allow you to assign, edit, or delete multiple shifts. Important: For all bulk actions, you must first pick a date range and set filters.
Picking a date range
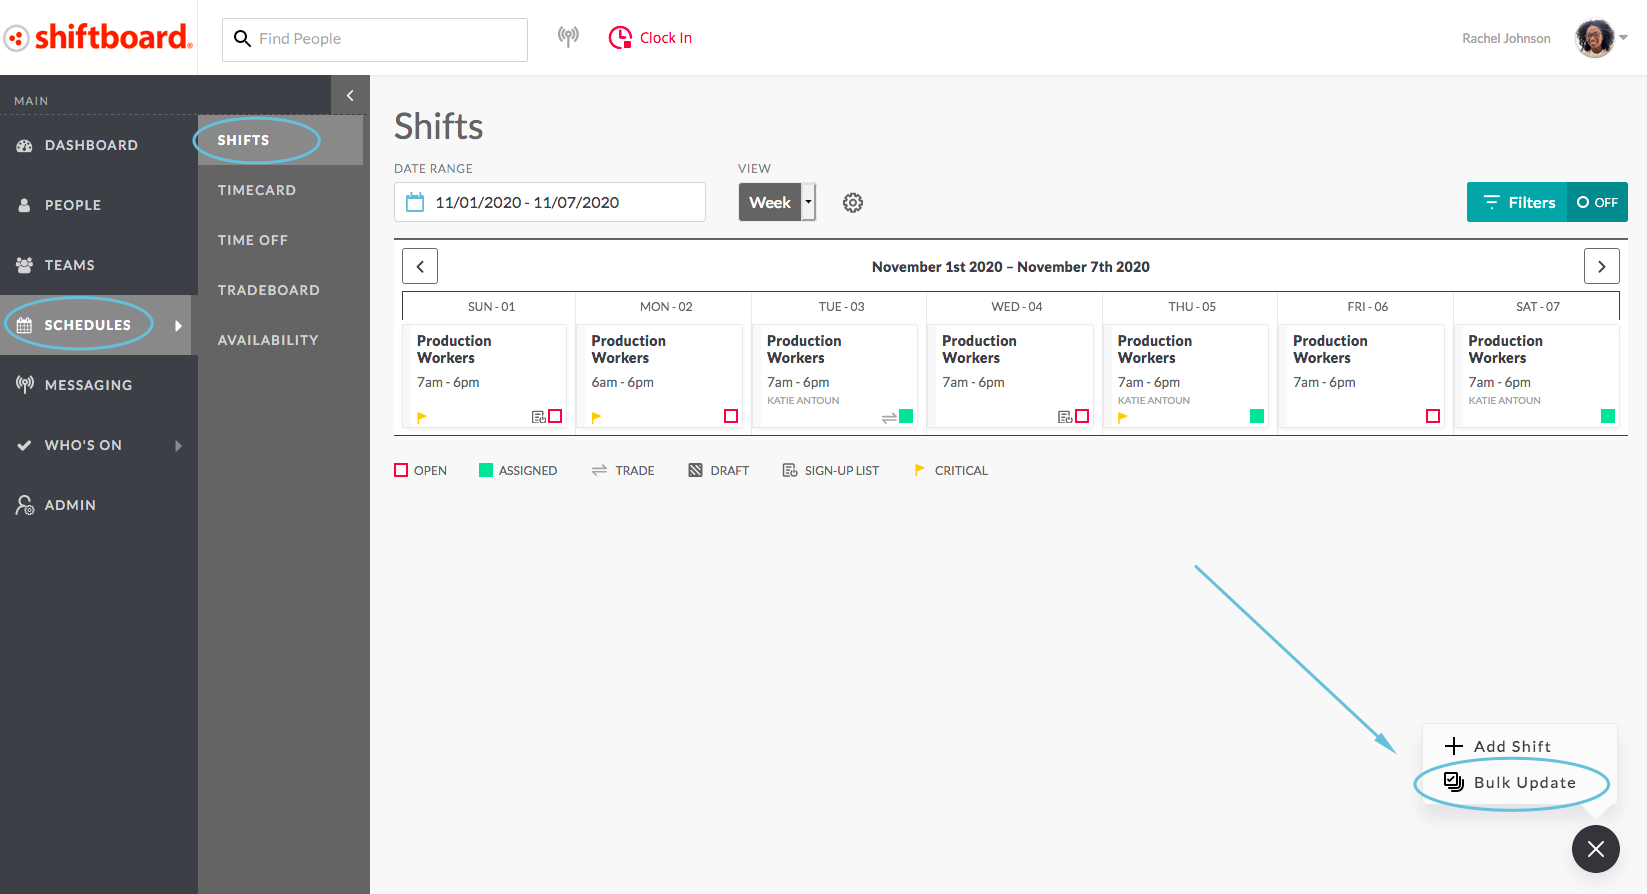
Navigate to the bulk update page
From the calendar, click the plus sign in the lower right corner of the screen, and select Bulk Update from the menu:
Pick a date range
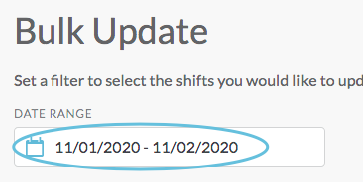
Click Inside the Date Range field:
Note: The field defaults to showing a two-day window of today and tomorrow.
The datepicker will drop down showing the currently selected dates:
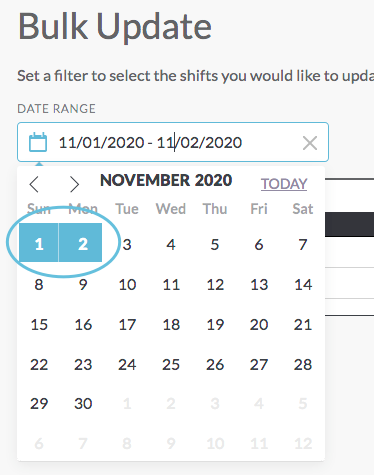
Click the start date for your desired date range. That date will show up with a blue square:
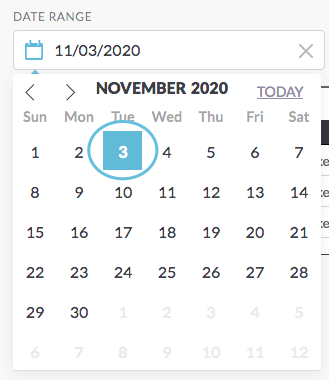
Click the end date for your desired date range. The date range beginning and end dates appear in dark blue, and the dates in between appear in light blue:
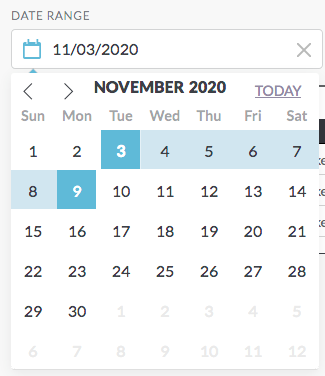
Upon clicking the end date:
- The datepicker immediately closes.
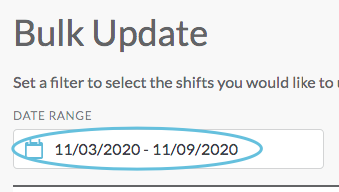
- The date range field displays the dates you chose.
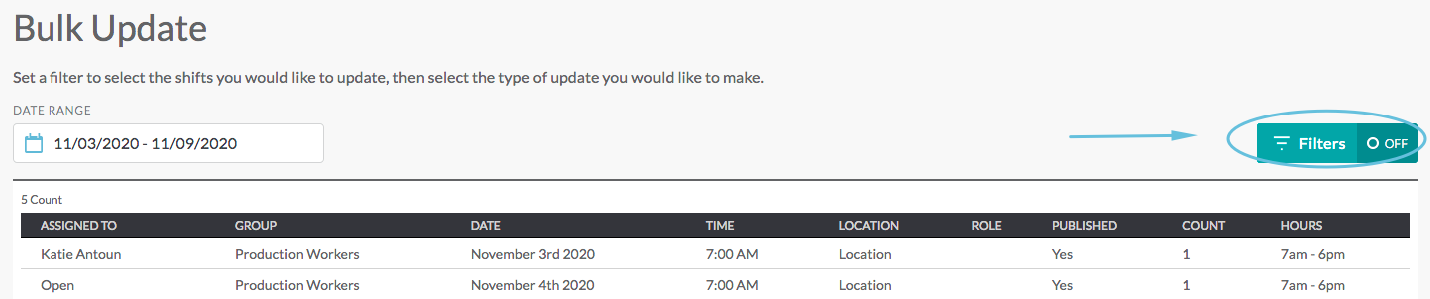
- The list of shifts (lower on the screen) updates to show only those within the selected date range:
How to set filters for bulk updates
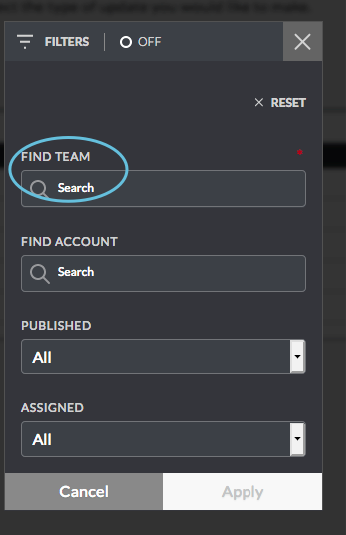
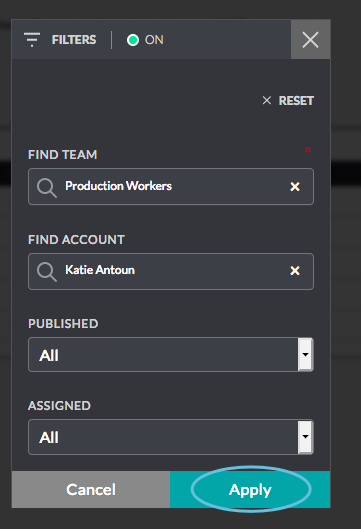
When making bulk updates to shifts, you must first select a team. This applies in all cases. Even if you are making a bulk change that applies to a specific person, you must first pick a specific team before you can pick a specific person or people:
Select Filters:
First choose a team (workgroup), and then you can also filter by account, published vs draft, and open vs assigned:
Note: if your workgroup name is not Team, you will see your workgroup name.
Click Apply to view results using the selected filters:
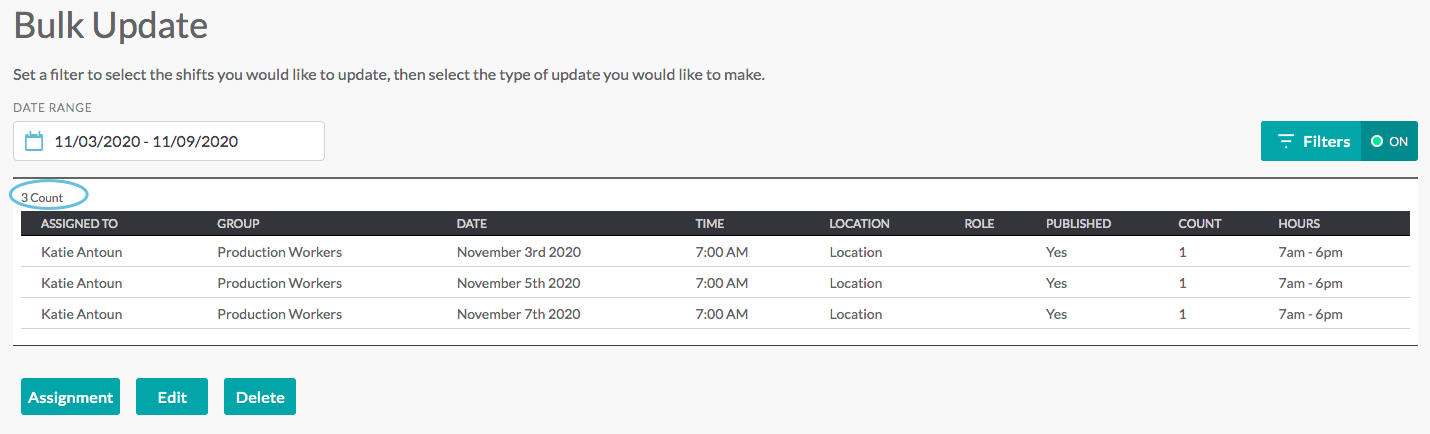
The filtered results will be displayed on the Bulk Update page:
Remember: Changes will apply to all shifts in the list.
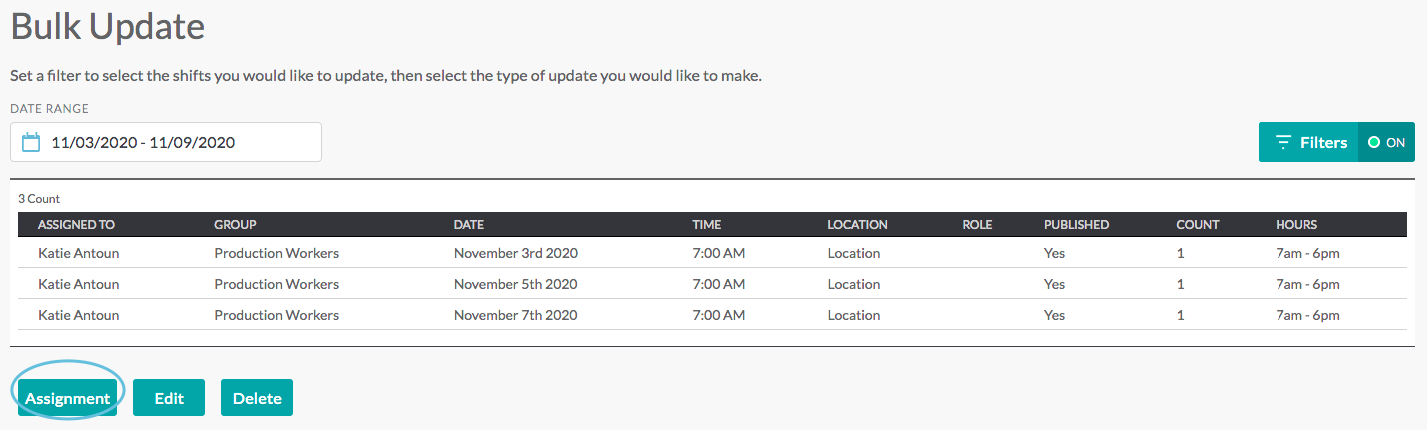
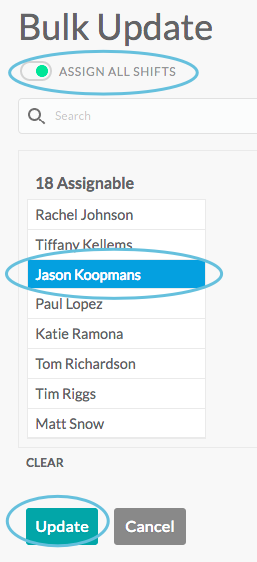
How to bulk assign or reassign shifts
After you select a date range and set filters (see above), the Bulk Update tool allows you to assign or reassign multiple shifts simultaneously. Bulk assigning shifts saves time in cases where you need to assign one person’s shifts to someone else, for example if the first person is out sick or leaves the organization.
Note: Bulk assignments can only be made when all shifts are for the same team.
From the Bulk Update page, click Assignment:
From the Bulk Update page, you can:
a. Unassign all shifts
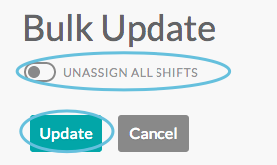
b. Reassign all shifts to the same person:
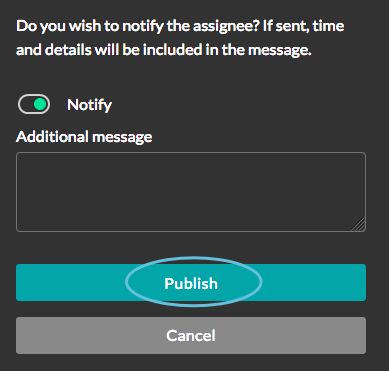
After you click Update, you will see a confirmation page that allows you to notify the people who will be affected by the change. Click Publish to save your bulk changes and return to the calendar:
After making bulk changes, you may need to refresh the page for the changes to reflect in the calendar.
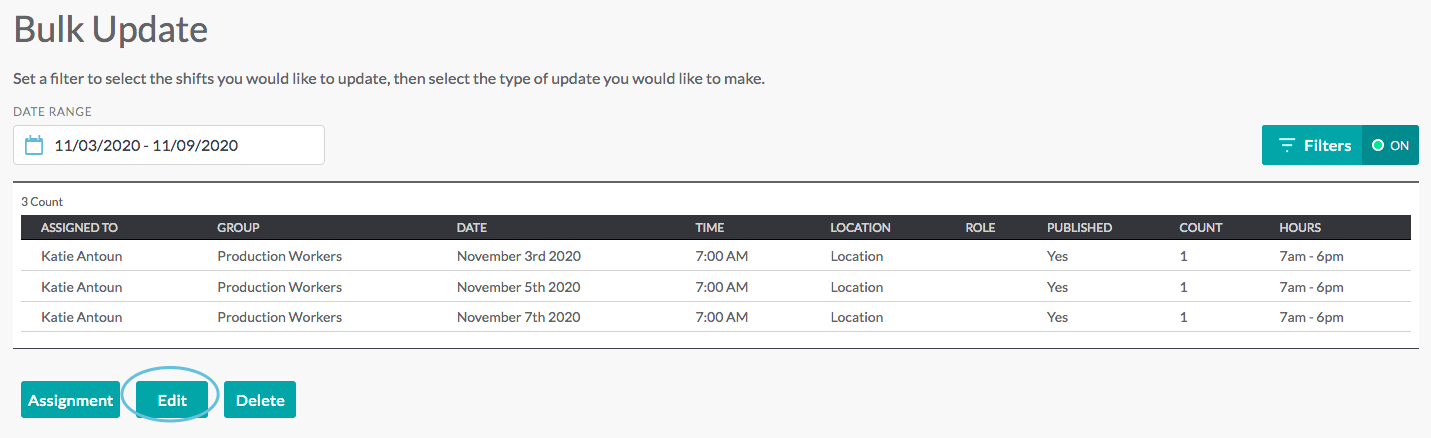
How to bulk edit shifts
After you select a date range and set filters (see above), the Bulk Update tool allows you to edit multiple shifts simultaneously.
From the Bulk Update page, click Edit:
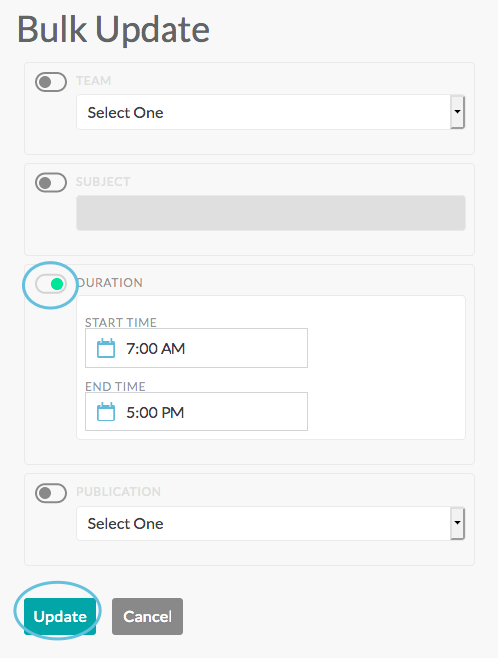
From the edit page, you can update the team, subject, duration, or publication status (publish or save as draft). First, for each field that you want to update, click the toggle button to green to enable the field, then make changes, and click Update.
Note: You can make changes to more than one field.
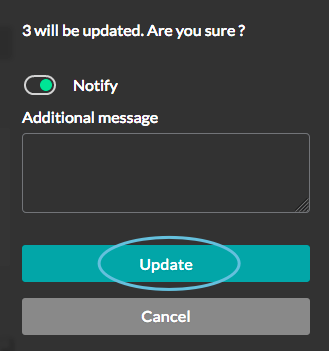
You will see a confirmation page that allows you to notify the people who will be affected by the change. Click Update to save your bulk changes and return to the calendar:
After making bulk changes, you may need to refresh the page for the changes to reflect in the calendar.
How to bulk delete shifts
After you select a date range and set filters (see above), the Bulk Update tool allows you to delete multiple shifts simultaneously. Most commonly, this tool is used to delete unwanted draft shifts.
From the Bulk Update page, click Delete:

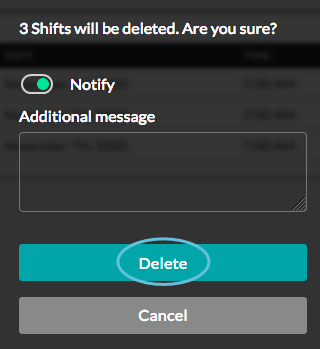
A confirmation page opens that allows you to notify the people who will be affected by the change. Click Delete on the confirmation page to delete the shifts and be returned to the calendar:
After making bulk changes, you may need to refresh the page for the changes to reflect in the calendar.