Timecards - Mobile Interface
 Updated
A timecard is a record of hours that a person worked. If the timeclock feature is enabled, timecards are automatically created based on clocked in/out times for shifts. If the timeclock functionality is not used then, a timecard can be added.
Viewing Timecards
To view timecards, navigate to the Timecard page:
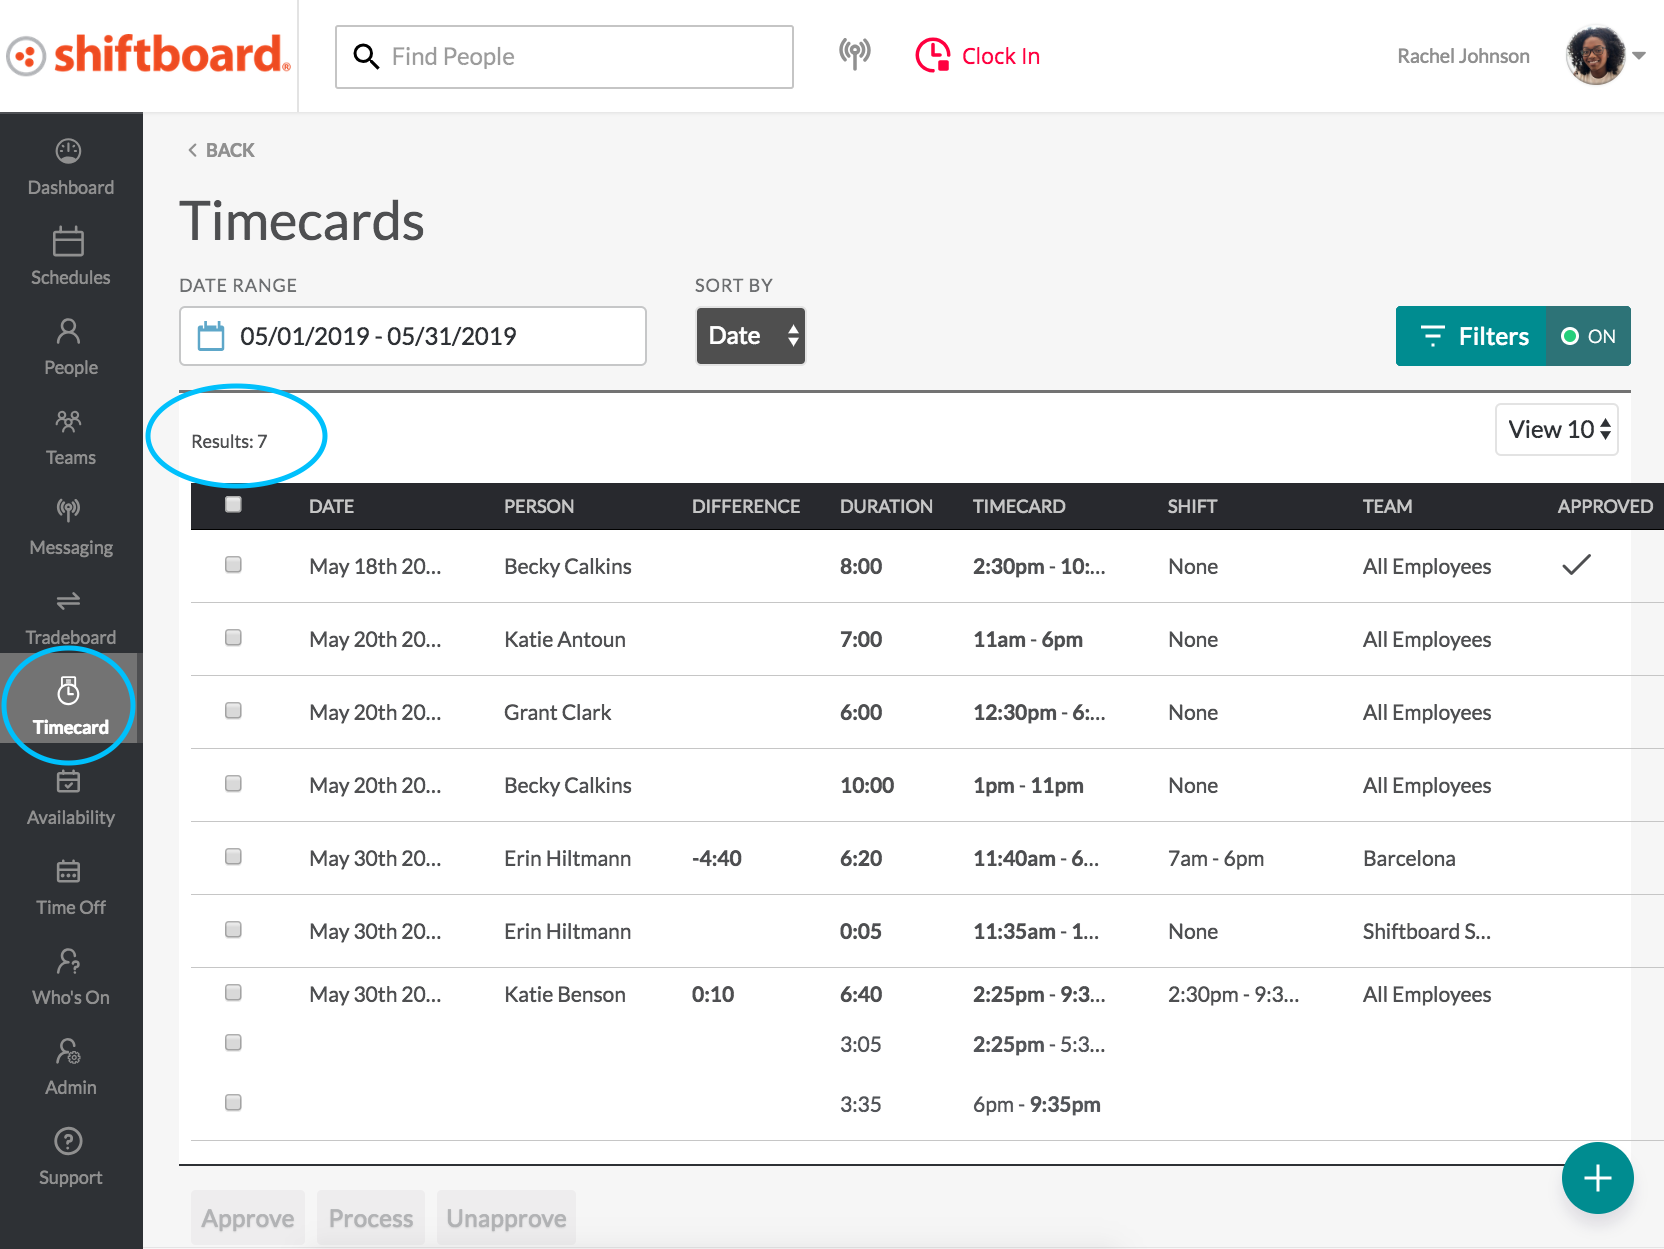
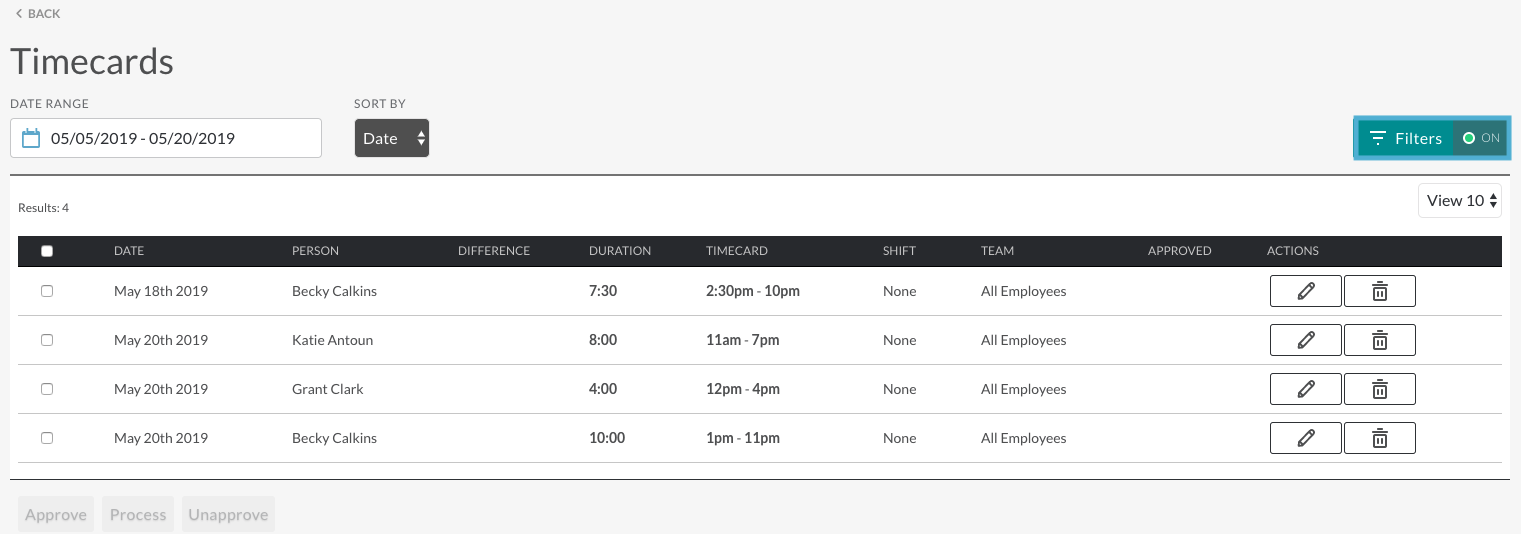
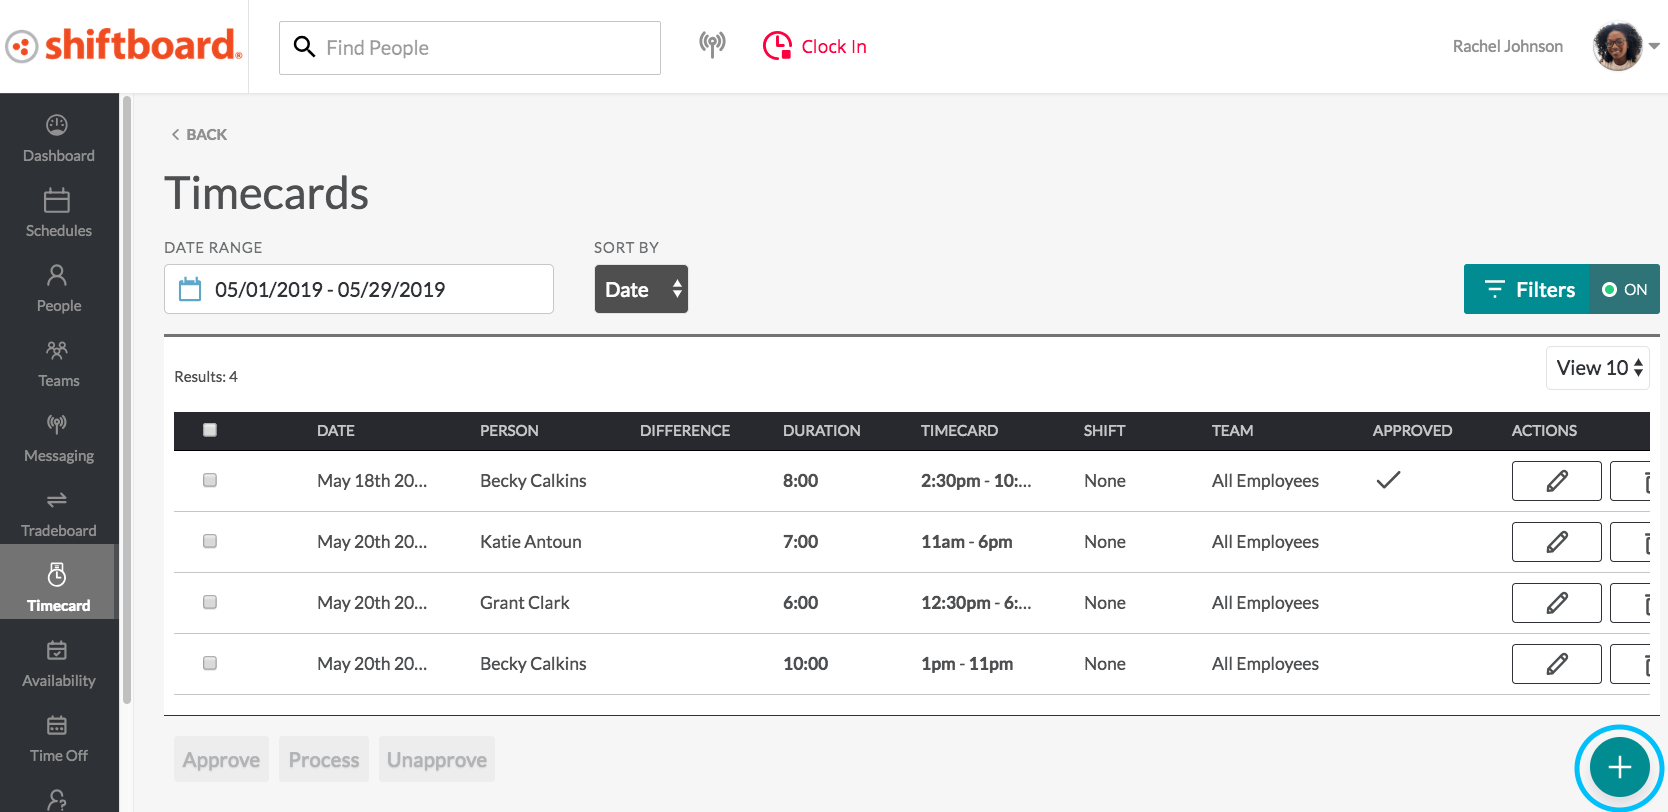
The timecard page automatically lists timecards that have yet to be approved or processed from the past 30 days. The total number of timecards in the list is shown in the top left corner:
View Details
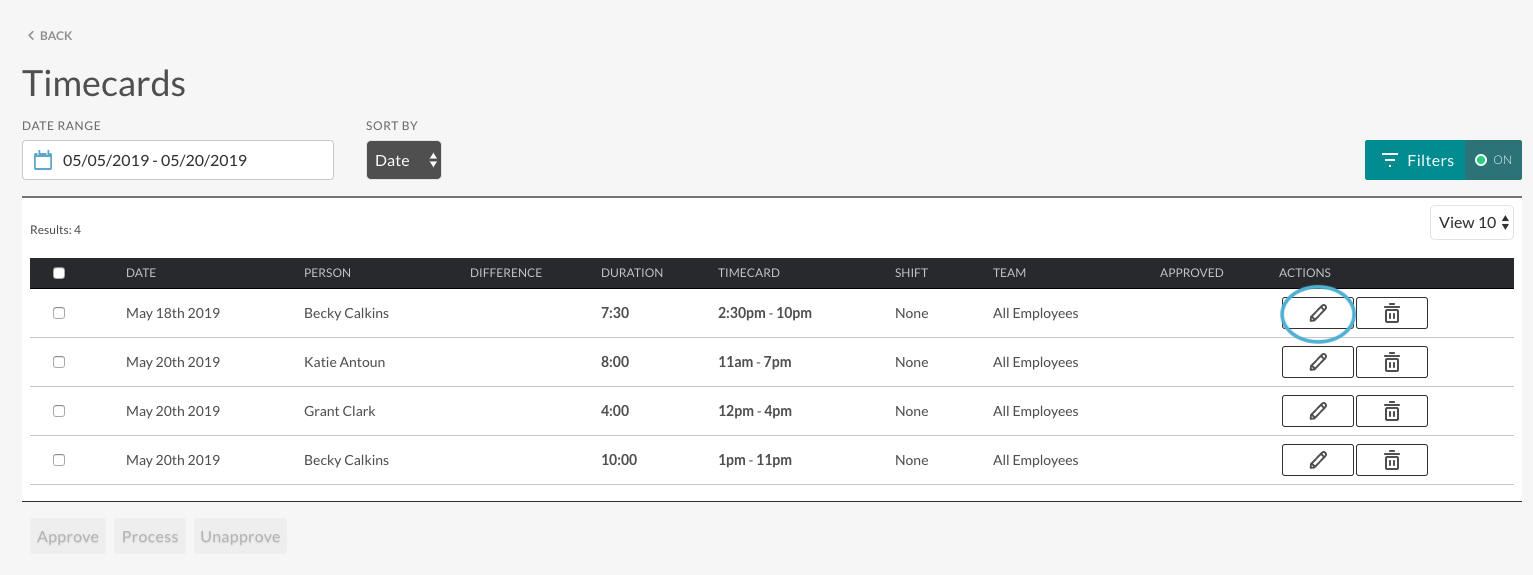
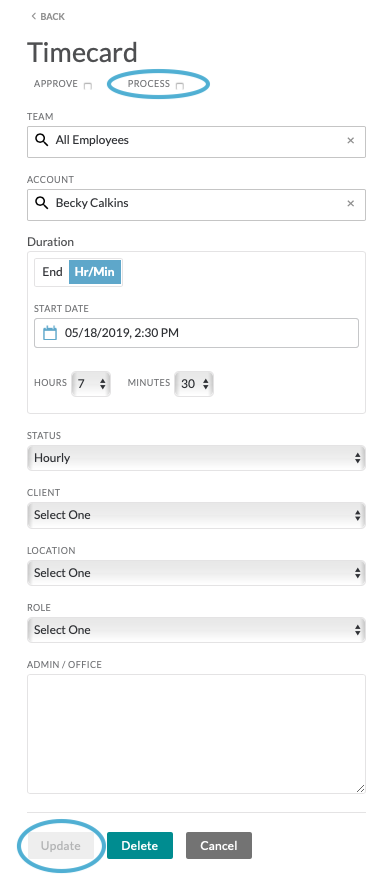
To review the timecard, click the pencil on the far right:

The timecard opens, listing the workgroup, person’s name, and how long the person worked. From this screen, managers can approve, process, edit, delete, and add notes to the timecard:
- Approve: Approving a timecard locks the timecard from further editing, and removes it from the default timecard list.
Note: Be sure to verify that all timecard details are correct before approving it. - Process: Processing a timecard removes the timecard from the default timecard list.
Note: To view processed timecards, use the filter (see below). - Team: Shows the workgroup associated with this timecard.
Note: if your workgroup name is not Team, you will see your workgroup name. - Account: Shows the person’s name who is associated with this timecard.
- Duration: There are two methods to enter the duration, either the start and end date and times worked, or the start date and number of hours and minutes worked.
- Notes: This is a field for notes related to the timecard.
- Admin / Office: This is a field for notes to the administrative staff.
- Action Buttons:
- Update: Saves any changes you made to the timecard, including approving or processing it.
- Delete: Deletes the timecard. Once deleted, it may not be retrieved.
- Cancel: Cancels any changes you made to the timecard and returns you to the list of timecards.
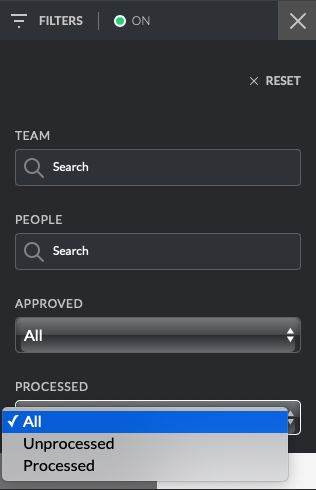
Using Filters Display Timecards
Use the filter to display timecards for a specific workgroup, person, set of dates, or status:
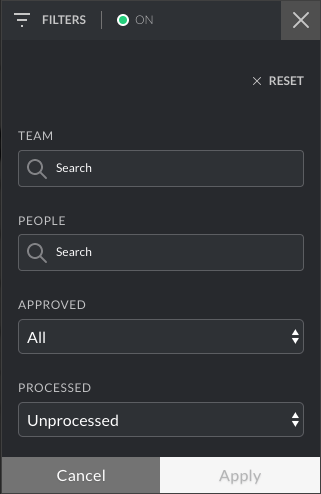
- Team: Select a specific workgroup from the the Team drop-down list. You can type the first few letters to shorten the drop-down list.Note: if your workgroup name is not Team, you will see your workgroup name.
- Account: Select a specific person from the the Account drop-down list. You can type the first few letters to shorten the drop-down list.
- Date Range: Enter start and end dates to see timecards for a specific date range.Note: The date range must be set at all times, and it defaults to the past 30-31 days.
- Timecard status:
- Approved: Displays a list of timecards that are already approved.
- Processed: Displays a list of timecards that are already processed.Note: Checking both boxes will display only those timecards that have been BOTH approved and processed.
- Action Buttons:
- Reset: Clears all filters and returns you to the original list of timecards that have not yet been approved or processed.
- Cancel: Cancels changes you made to the filter selections, and reverts to the previous filter settings.
- Save: Saves your filter settings, and then displays timecards that match your selections.
Processing and Approving Timecards
Timecards remain in the default timecards list until they are processed or approved.
How to Process a Timecard
From the default timecards list, click the pencil icon:
Review the details page:
- Make any necessary changes, or add notes.
- Click the Process checkbox at the top of the page.
- Click Update at the bottom of the page
After clicking Update, you will be returned to the default timecard page. The timecard will no longer be shown in the default timecards list, and a message “Timecard updated” will appear briefly at the top of the screen.
To view a list of processed timecards, open the filter, click Processed, then Save, and a list of only processed timecards will appear:
Note: To un-process a timecard, open the timecard, uncheck the Process checkbox, and click Update. The timecard will once again show up in the default timecards list.
How to Approve a Timecard
From the default timecards list, click the pencil icon:

Review the details page:
- Make any necessary changes, or add notes.
- Click the Approve checkbox at the top of the page.Note: Once the timecard is approved, it is locked from further editing, so be sure to verify that all timecard details are correct before approving it.
- Click Update at the bottom of the page.

After clicking Update, you will be returned to the default timecard page. The timecard will no longer be shown in the default timecards list, and a message “Timecard updated” will appear briefly at the top of the screen.
How to Edit or Delete a Timecard
Once a timecard is created, it can be edited or deleted. Any changes made by a worker will require manager approval. All timecard updates must be completed before approving or processing a timecard.
In the timecards list, click the pencil icon to edit the timecard. You can also select the Trash icon to delete the timecard:
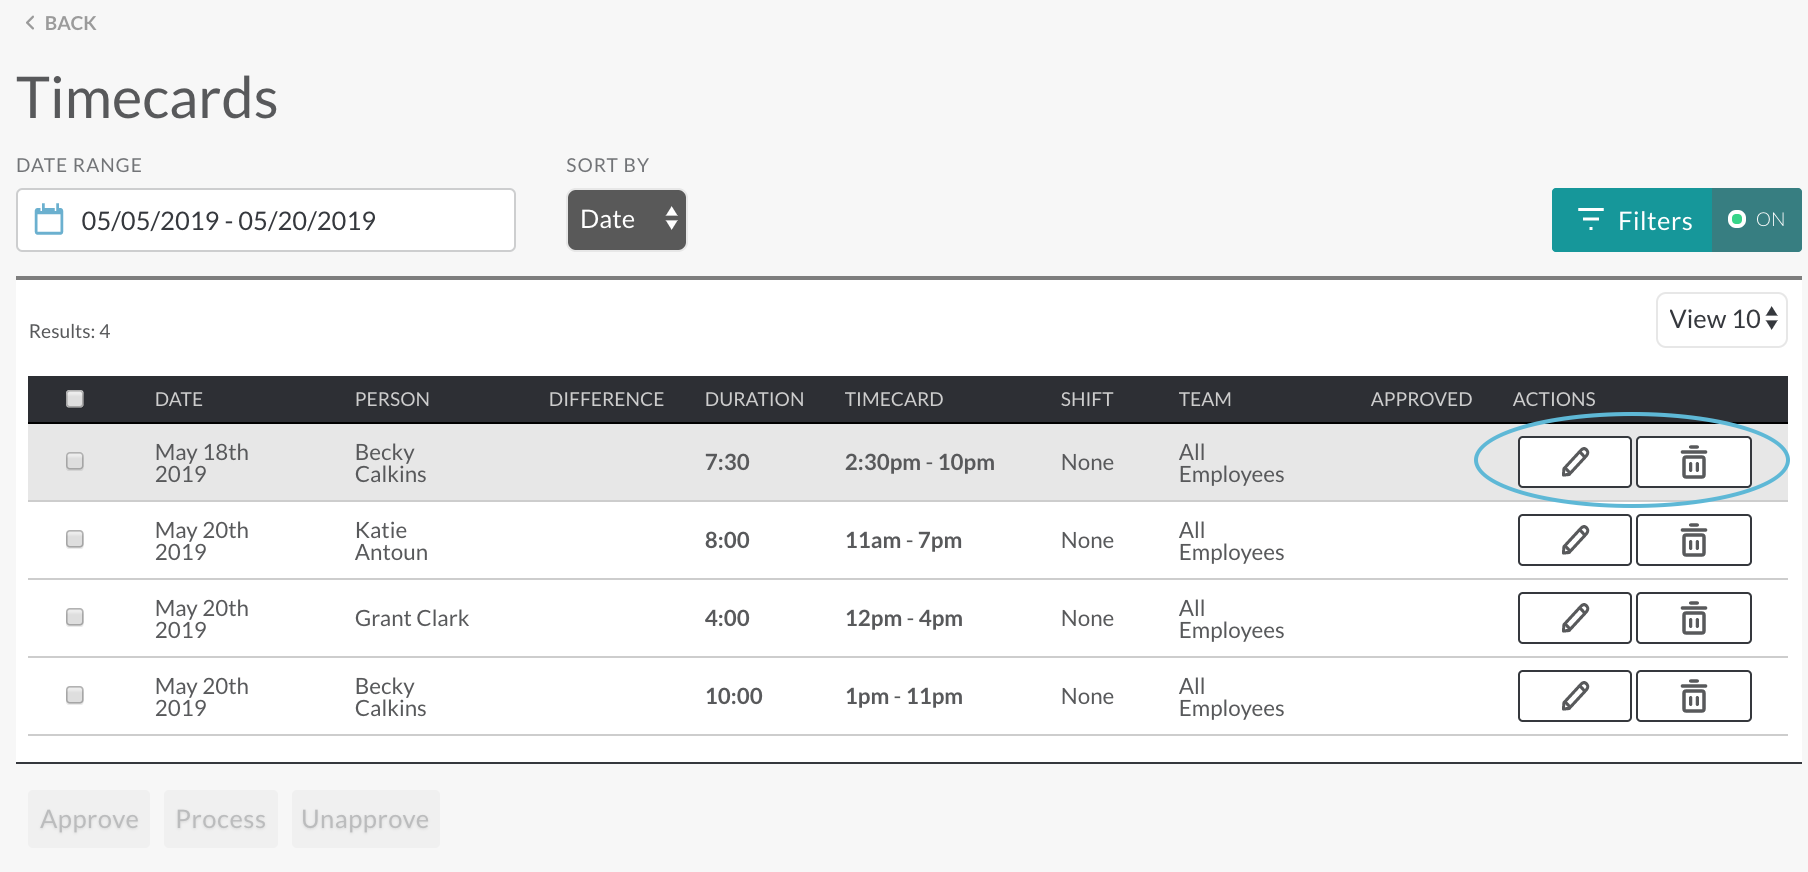
Make any desired changes, then click Update to save your changes and return to the timecards list, click Delete to remove the timecard from the list, or click Cancel to not save changes and return to the Timecards list.
Adding a Timecard
If the timeclock functionality is disabled or someone forgets to clock-in or -out for a shift, timecards can be added manually.
To add a timecard, click the plus button (+) on the main timecards screen:
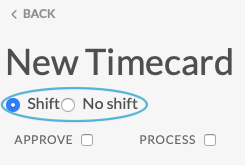
Choose Shift or No Shift at the top of the New Timecard form:
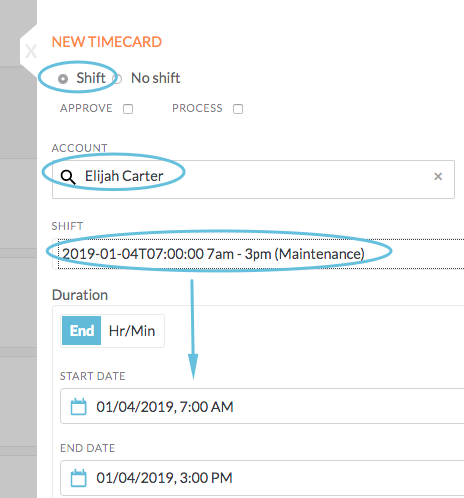
If you choose Shift, then the next two fields will be:
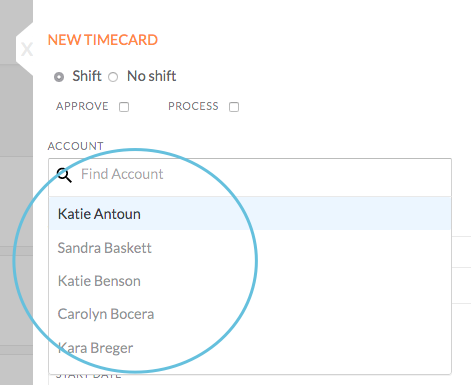
a. Account: Choose a person from the drop-down list:
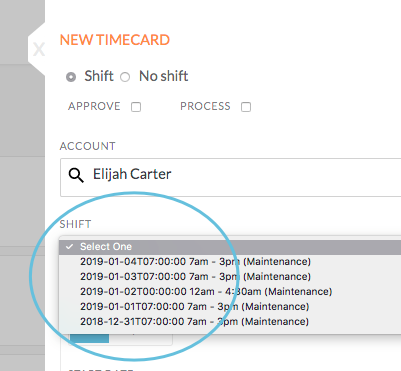
b. Shift: Choose a shift from the drop-down list of the person’s assigned shifts:
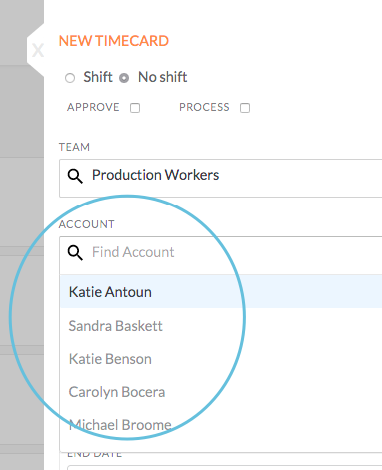
If you choose No Shift, then the next two fields will be:
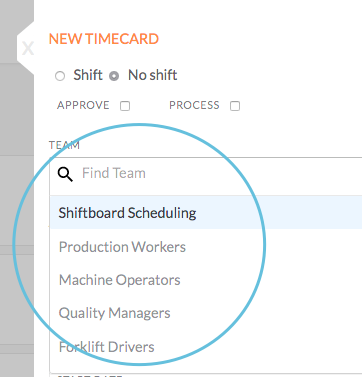
a. Team: Choose a workgroup (team) from the drop-down list. You can start typing the name to shorten the drop-down list.
b. Account: Choose a person from the drop-down list. You can start typing the name to shorten the drop-down list.
Choose Duration
If you previously selected an existing shift for a specific person, then the dates/times for that shift will automatically show up in the Duration section:
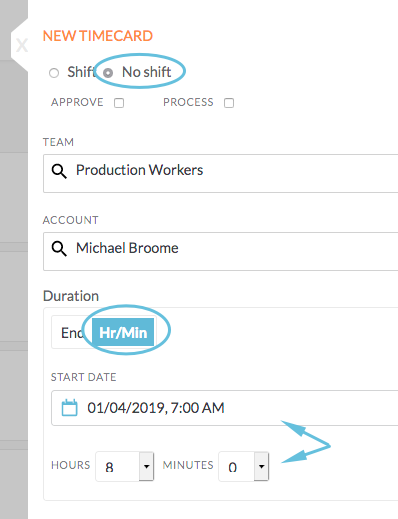
If you are creating a timecard with no specific shift selected, then enter either:
- Start and end dates and times for the shift:

- Start date and time, along with the number of hours and minutes worked:
Enter notes related to the shift in the Notes box, and information for the administrative staff in the Admin/Office box:
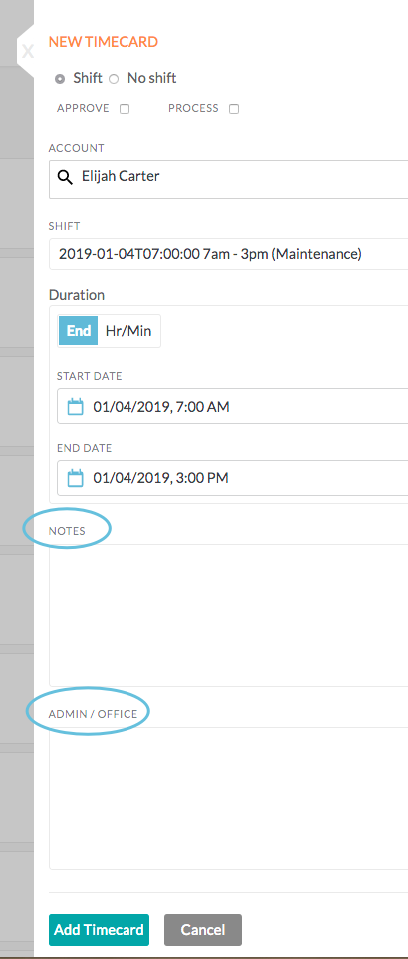
At the bottom, click Add Timecard to add this timecard to the list, or click Cancel to exit without saving changes.