Broadcast Messages
 Updated
Broadcast Messages can be used to send a message to multiple recipients by email and SMS/TXT. Broadcasts can be sent to all members, specific teams, or custom groups of members based on profile information, availability, or geographic location.
Send a Broadcast Message
To send a broadcast, select Teams > Broadcast. Set appropriate filters for the message and review before sending.
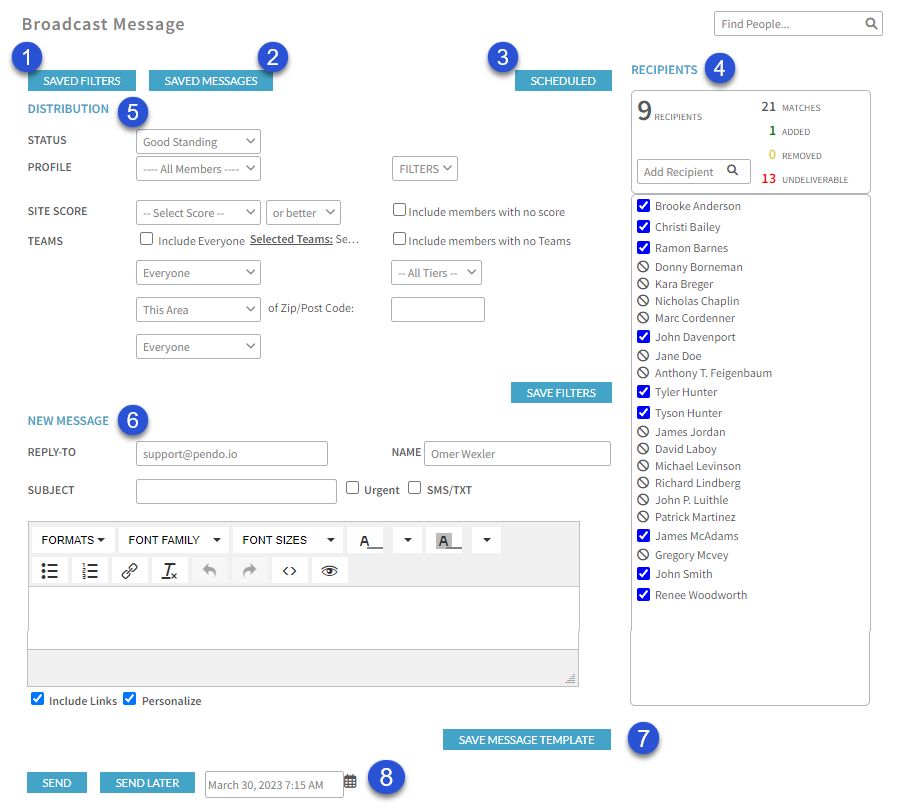
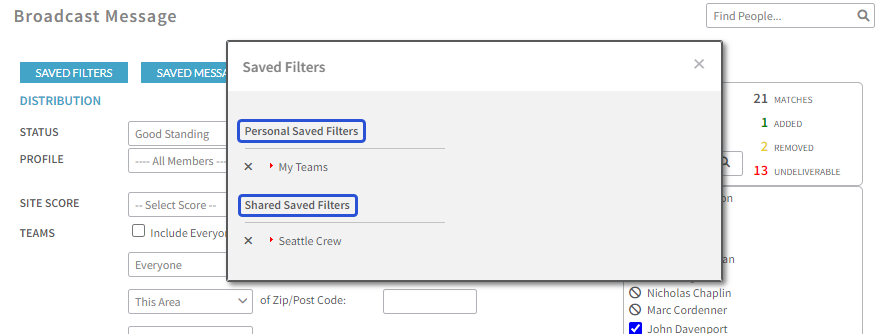
- Saved Filters: Saved list of recipients. The lists can be saved for personal use or they can be shared across the site.
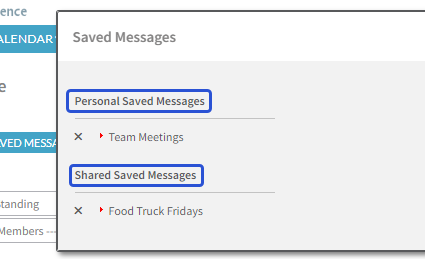
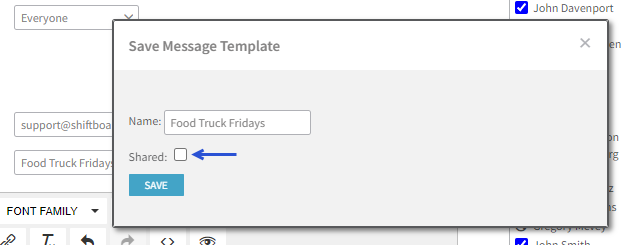
- Saved Messages: Saved message templates. The templates can be saved for personal use or they can be shared across the site.
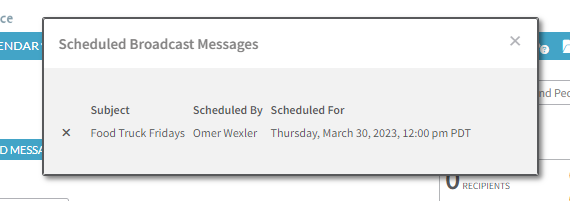
- Scheduled: Select this to see what messages are scheduled to go out and when. Scheduled messages can be seen across the organization, so be careful when removing one from the list.
- Recipients: The list of people who should receive this message via email (SMS recipients are not logged here). The list will change as filters get updated. You can also remove or add individuals from the list.
- Matches--Number of people populated from the filtering
- Added--Number of people added to the recipient list outside of the original filtered group
- Removed--Number of people manually deselected from the original filtered group
- Undeliverable--Number of people with undeliverable email addresses on file.
- Distribution: Displays who should receive the message
- Status--Filter recipients based on their status (e.g., good standing, admin hold, etc.)
- Profile--Filter recipients based on a specific profile type
- Filters--Filter the list based on profile fields
- Site Score--If Account Scoring is used, filter recipients based on their scores
- Teams--Click Selected Teams to choose from teams. Site Admins have the option to include everyone to message the entire organization.
- Everyone--Use the checkboxes to select whether to send the message to any combination of members, coordinators, or managers.
- This Area--Limit recipients based on their proximity to a specific zip/postcode. Select the desired radius from the "This Area" drop-down, then enter the zip/postcode. This option will check proximity based on the address on each member's profile. Any members with no address information in their profile will be excluded from the message distribution.
- Everyone--Use this dropdown to select one of the following:
- Everyone--Sends the message to any members who satisfy the other filters/criteria entered.
- Have Signed-on--Sends the message only to members who have signed on to their account at least once.
- Have Not Signed-on--Sends the message only to members who have not yet signed on to their account.
- With Assignments--Sends the message only to members who are currently assigned shifts during a specified day/time range.
- Without Assignments--Sends the message only to members who are not currently assigned shifts during a specified day/time range.
- New Message: Displays who the message is sent from
- Reply To--The email address that responses (if any) to the broadcast message will be sent to. This defaults to the email address of the person who is sending the message.
- Name--The name that is displayed in the From field of the sent message.
- Save Message Template: To save a template, fill out the New Message section and select Save Message Template. You will have the option to share this template with the site or keep it in your personal templates.
- Send or Send Later: Messages can be sent right away or scheduled for a later date/time. If scheduled into the future, they can be removed by selecting Scheduled at the top of the page.