Broadcast Message - Mobile Interface
 Updated
Managers and site administrators can use the Broadcast Message tool to send emails and text messages to workers within the Shiftboard site.
Broadcast messages can be sent to:
- Everyone in the organization
- Everyone in a workgroup
- Groups of people based on profile information, availability, or shift assignments.
For example, if you need to fill an open shift on short notice, you can send a broadcast message to the members of a specific team (or teams) who are available to work at that time.
How to Send a Broadcast Message
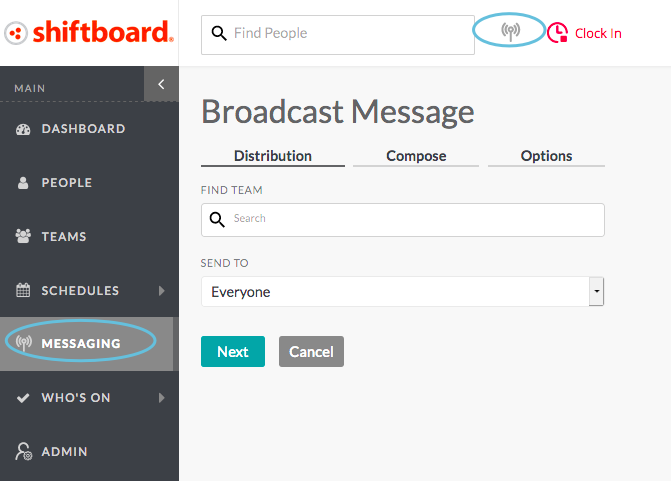
To send a broadcast message, start by clicking the broadcast icon at the top of the page or select Messaging in the left navigation bar:
The Broadcast Message page has three tabs across the top—Distribution, Compose, and Options. Each tab is explained below.
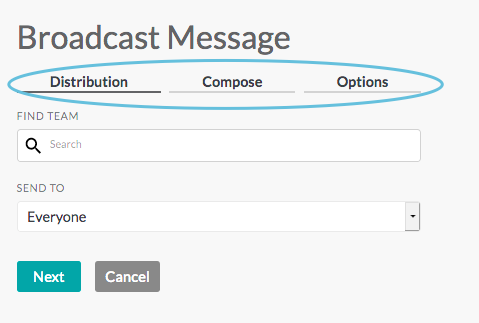
Distribution
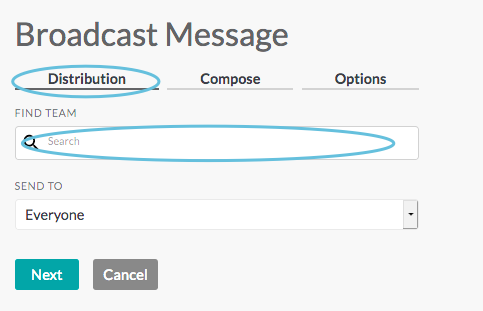
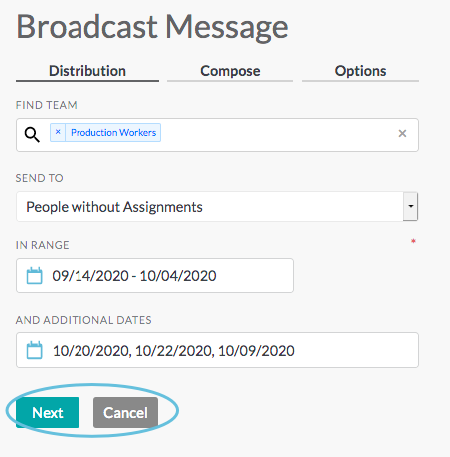
The Distribution tab lets you select who will receive the message. To set up distribution for your broadcast message, follow these steps:
Select a group or group(s) that you want to message:
Click inside the Find Workgroup search box:
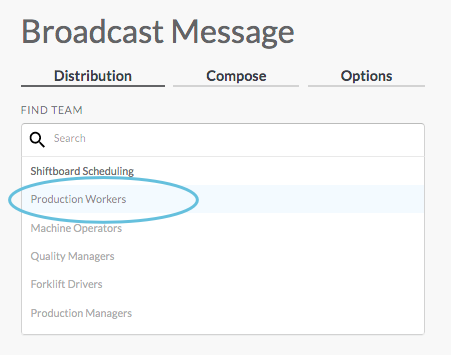
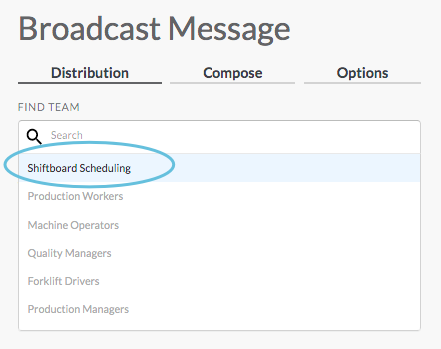
After clicking inside the search box, choose a group from the drop-down list, or start typing the name of the group you want to add and then choose it from the drop-down list:
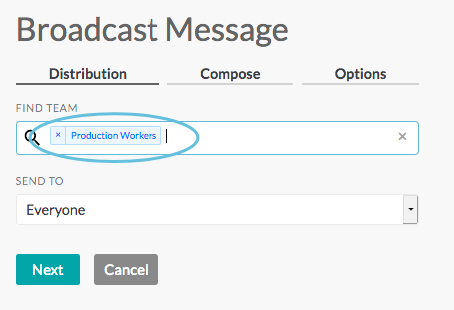
Once you click on the group name in the drop-down list, the group appears in the search bar:
Note: To send a message to everyone in the organization, choose the site name, which appears at the top of the drop-down list:
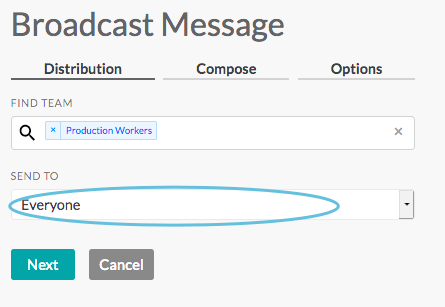
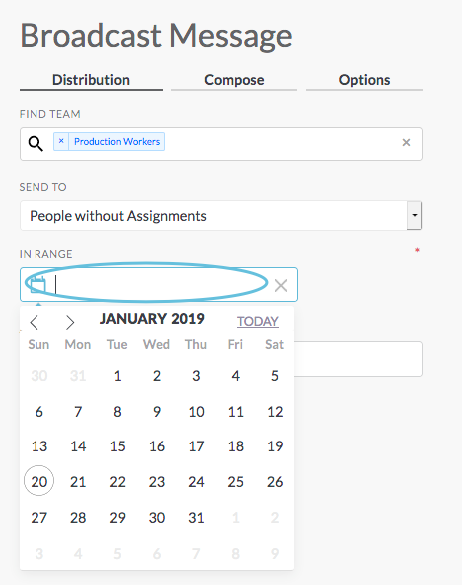
Select who to message from within the group(s):
Click inside the Send To search box:
Choose a group from the drop-down list:
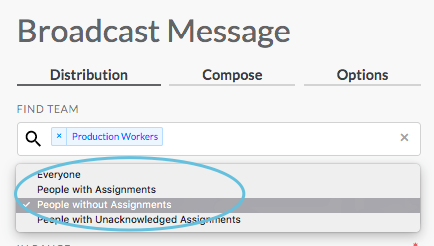
- People with Unacknowledged Assignments: Sends the message only to members who currently have unacknowledged assignments during a specified day/time range.
- Everyone: Sends the message to any members who satisfy the other filters/criteria entered. If you select Everyone, then move to the Compose tab.
- People with Assignments: Sends the message only to members who are currently assigned shifts during a specified day/time range.
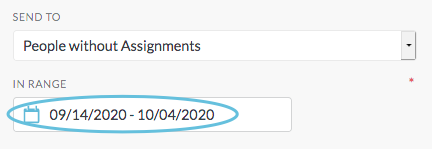
- People without Assignments: Sends the message only to members who are not currently assigned shifts during a specified day/time range.
Select dates
You may select a date range using the In Range field, or you can select one or more specific dates using the Add Additional Dates field. The In Range and And Additional Dates fields can be used together to select a date range as well as other individual dates.
To select a date range
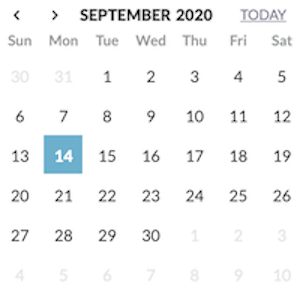
a. Click inside the In Range field to display the date picker:
b. Click the start date for your desired date range. That date will show up with a blue square:
c. Click the end date for your desired date range. (The date range beginning and end dates will appear in dark blue, and the dates in between will appear in light blue.)
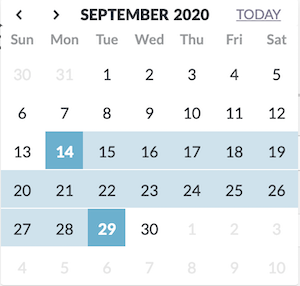
Note: You can select a single day by clicking the same date a second time.
d. Upon clicking the end date, the datepicker immediately closes, and the date range field displays the dates you chose:
Select additional dates
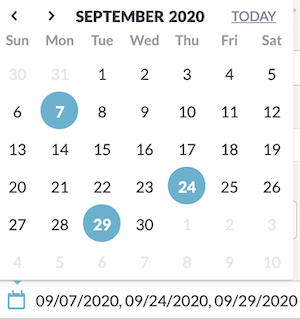
a. Use the And Additional Dates field to select additional dates that are outside of the previously selected date range.Note: This field does not allow you to select another date range, but you may individually select multiple adjacent days.
b. From the datepicker, click one or more dates to add them to the list. To close the datepicker, click anywhere outside of the datepicker or hit Esc.
c. Click Next (or click the Compose tab) to move to the Compose tab, or click Cancel to cancel this Broadcast Message.
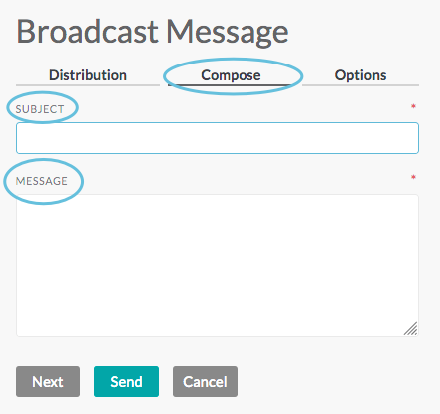
Compose
The Compose tab is where you write the message.
- Compose message—Fill in the Subject and Message just as you would for a regular email message:
- Action Buttons
- Next: Takes you to the Options tab (or click the Options tab)
- Send: Sends the message without changing the default options
- Cancel: Cancels the broadcast message
Options
The Options tab allows you to set a reply email, sender’s name, and other preferences:
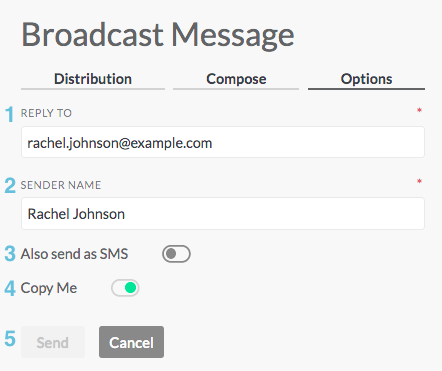
- Reply to: Responses to the broadcast message will be sent to this email address. This defaults to the email address of the person who is sending the message.
- Sender name: The sender name is displayed in the From field of the sent message.
- Also send as SMS: People can opt-in to receive broadcast messages via text on the notification tab in their profile. Note: SMS/text notification is in addition to email; those who opt-in will receive both email and text.
- Copy me: When Copy Me is set to On (green), a copy of the message will be sent to the Sender’s email address.
- Action buttons:
- Send: Sends the message without changing the default options
- Cancel: Cancels the broadcast message
You can move back to a previous tab without canceling the entire message just by clicking on the tab heading.
Message Sent Confirmation
After clicking the Send button, a Message Sent notification will appear on your screen: