Time Off Requests
Shiftboard's Time Off tool allows members to request time off through the system. Site Administrators or Managers can approve or deny these requests. Once the request has been approved, the member cannot be scheduled for shifts. Additionally, if a member is already scheduled for a shift, the system will indicate the conflict so you can remove the worker from the shift and open it for pickup or reassignment.
To configure the Time Off tool for your business needs, you may want to start by answering the following questions:
- Who should be notified of requests--site administrators, team managers?
- Should members see approved requests for team members?
- Are categories required and what are they (PTO, vacation, FMLA, etc.)?
- Should paid/unpaid be shown and how should it default?
- What is reported if a member selects all day (8 hours, 10 hours, etc.)?
How to Configure Time Off Settings
Go to Settings > Application Settings > Time Off. Select the question mark to the left for definitions of each setting.
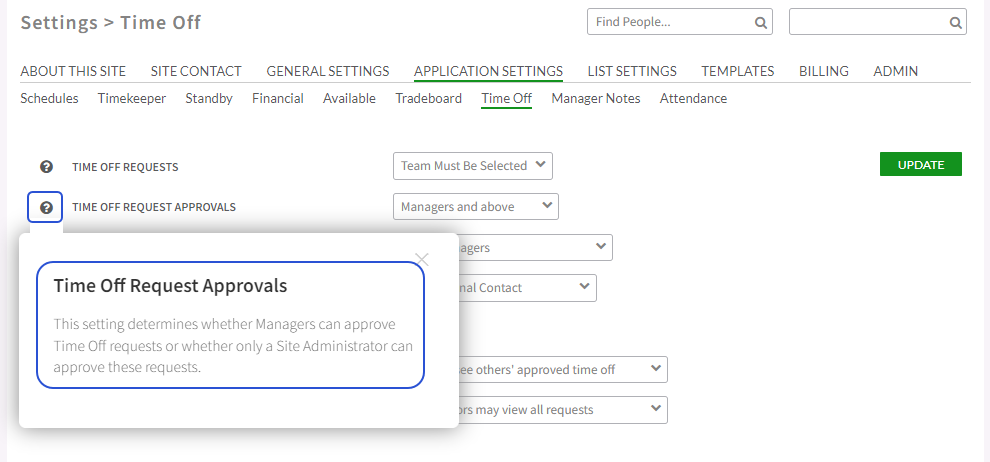
Remember, when doing any kind of update to the settings in the site, click "Update" to save changes.
Creating a Time Off Request For Members
Time off requests can be submitted under a member's profile by selecting the "Time Off" option under Account Toolbox. After clicking "Time Off," a screen appears where the request can be entered.
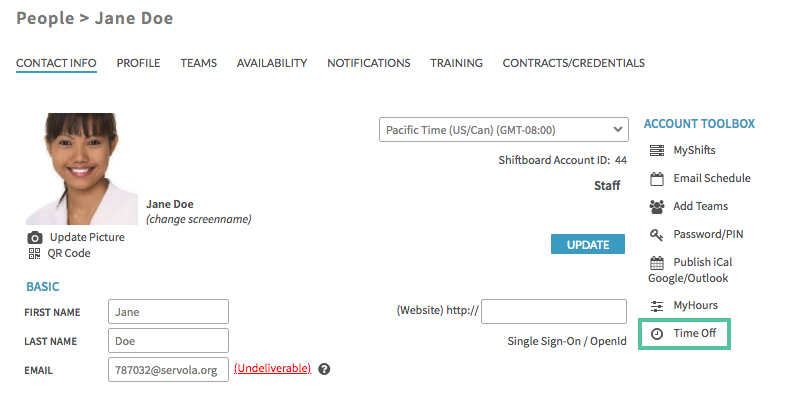
If entering multiple dates, select "Additional Dates", choose the first date, then click "Add" and continue to add in days. Once this is done, click "Submit."
Approve/Decline Time Off
Once a request has been submitted, the appropriate contact(s) will be notified.
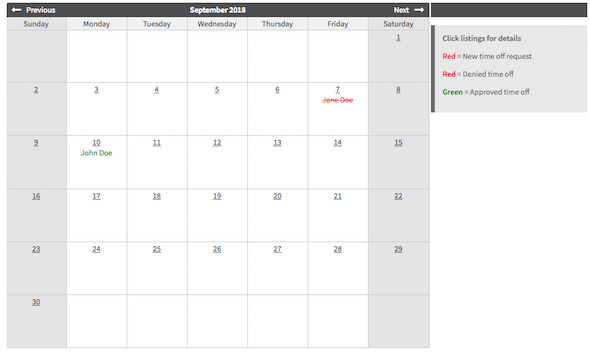
To approve/decline time off requests, go to Calendar > Time Off. To learn about the Time Off viewing options, follow the number in the image to the corresponding explanation below.

- Filter Section: Site Administrators and Managers can approve or deny Time Off requests. When viewing requests, change viewing preferences by filtering member requests by Teams, Accounts, and Status. After filling in the necessary information, select Apply.
- Approve/Deny: When ready to approve/decline a member's request, check the box next to their request and then click "Approve or Deny." It is possible to give a reason as well; this information will be sent to the member's email associated with the account.
- If you deny a time off request, it will show with a strikethrough on the calendar view as shown in the screenshot below.
- View the calendar to see how many members have requested the same day off and who has already been approved. To view this information in a document, click "Download."
- Calendar View: You can view time off requests by month in a calendar view. This view allows filtering by teams