Attendance
 Updated
Shiftboard’s Absenteeism tool can allow your workers to call out of their own shifts, and mark themselves as absent without a manager needing to log in. You can control the reasons your workers have to choose from, as well as when these reasons are available to them before or after their shift starts. You can also choose to automatically replace worker call outs with a new shift, notifying members of that team so they can pick that shift up if they'd like, again all without a manager needing to login to Shiftboard.
Absenteeism Settings
The settings to control this tool can be found in your Application Settings, under the Absenteeism section. If you do not see this option as a site administrator, please contact our support team to ask about turning this tool on. Once you have navigated to the Absenteeism settings, you will see the below options.
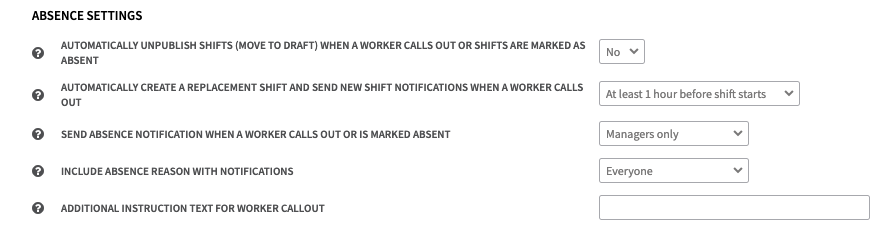
Automatically unpublish shifts (move to draft) when a worker calls out or shifts are marked as absent: When marking a worker absent, you can use this setting to also automatically unpublish the shift, hiding it from the calendar from your workers. You will still be able to run reports around these shifts to track absences.
- Please note that to ensure accurate reporting, you will need to leave the original shift assigned to the original worker, and you cannot delete the shift.
- When 'Automatically create a replacement shift and send new shift notifications when a worker calls out' is set to 'Yes', a new unassigned shift will be created, and the worker who just called out will see this new shift on their calendar.
Automatically create a replacement shift and send new shift notifications when a worker calls out: This option only comes into effect when a worker marks their own shift as absent, and only when they do so within the window you specify. With this enabled, when a worker marks themselves as absent, an open shift is automatically created, and notifications are sent to workers assigned to the team so they can choose to pick up the shift.
- If you are using our Premium SMS tool, this notification is also sent as a text to workers which they can accept by replying to that text with the code they receive.
Send absence notification when a worker calls out or is marked absent: When a worker marks their own shift as absent, you can choose to send a notification to coordinators or managers of the team to make them aware of the scheduling change. Additionally, when a team scheduler marks a shift absent, you can choose to notify the shift assignee, team coordinators, or team managers.
Include absence reason with notifications: If a user receives an email notification about an Absence, this setting can optionally be used to show the Absence Reason to only some recipients. This tool could be leveraged to avoid showing sensitive Absence Reasons to some users.
Additional instruction text for worker call out: When a worker receives their call out confirmation, you can choose to add additional text which may include instructions on who to contact, or next steps.
Editing Absence Reasons
Finally, you can use the ‘Edit’ button to create and maintain your own list of absence reasons unique to your organization. Please keep in mind that you cannot edit or delete a reason, and so we highly recommend taking some time to think about this list before creating it for your organization. Reason codes can be whatever fits your organizations's needs, but common reasons are Emergency, Sick/Illness, or No Reason.
When clicking Edit, you will see the following options:
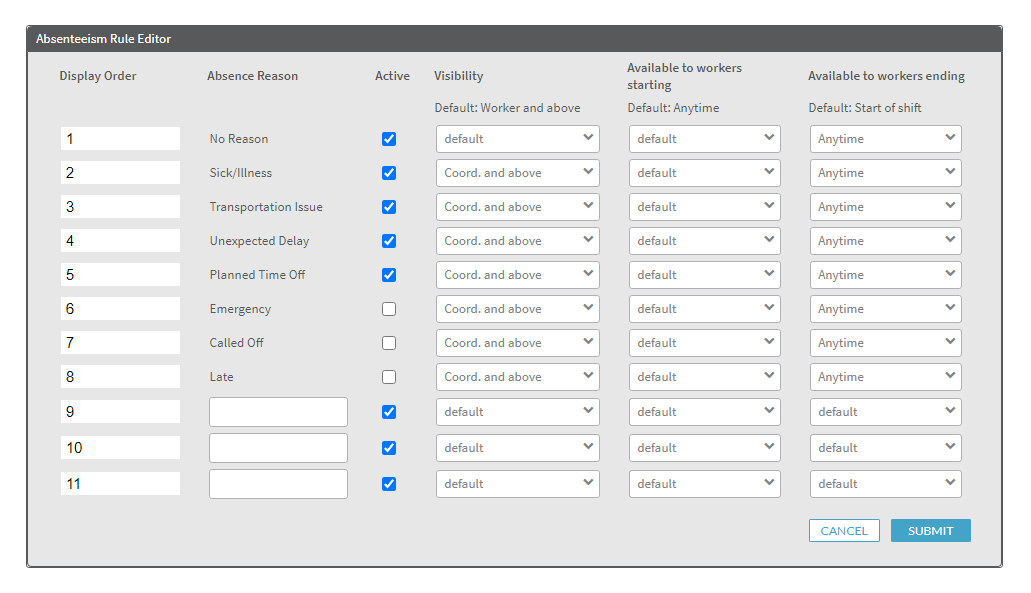
Display Order: Allows you to control what order you would like the list of reasons to be displayed in.
Absence Reason: Allows you to create new reasons.
Active: Allows you to activate or deactivate a reason. You may do this for reasons specific to certain times of year, like Holidays, or bad weather in the winter.
Visibility: Allows you to control who should have permission to view this setting. If you would like to prevent your works from calling out of their own shifts, you will need to adjust these accordingly.
Available to workers starting: Use this setting to control when you would like your workers to first see the option to call out of their shift using this reason.
Available to workers ending: Use this setting to control when your workers should no longer be able to call out of their shifts using this reason.
Marking Workers Absent
Once this tool has been enabled, you have the ability to mark when workers do not show up to an assigned shift. You can mark absences for past, present, and future shifts. There are two main ways to do this. The first is for when you need to mark an absence for a day of scheduled shift. Click the Who's On Button > Scheduled. From the pop up screen, you can click the 'Mark Absent' button.
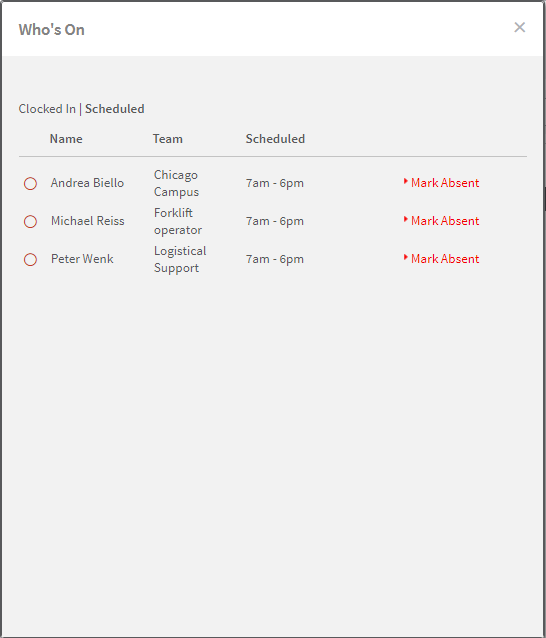
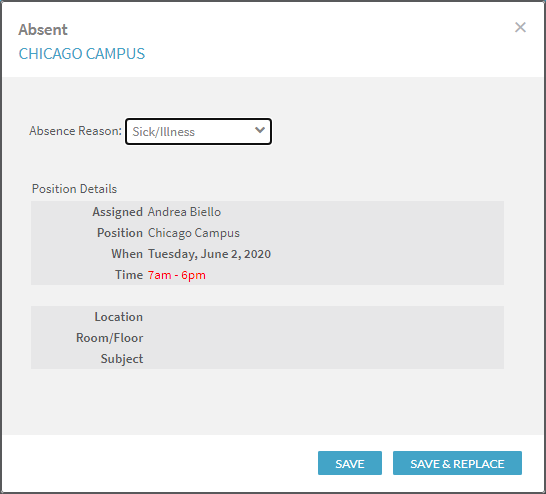
Now, an additional pop up screen will appear and you will be able to select a reason. To simply mark this shift absent, once you click 'Save', you will be good to go! If you would like to create an exact copy of that shift to be assigned to a new user, or to allow other workers assigned to that team to pick up the shift, you will need to click 'Save & Replace'.
The second method of marking absences is found from the calendar. To do this, go to Calendar > Schedules. Click on the shift that you need to mark as an absence. In the box that appears, click the 'Mark Absence' link.
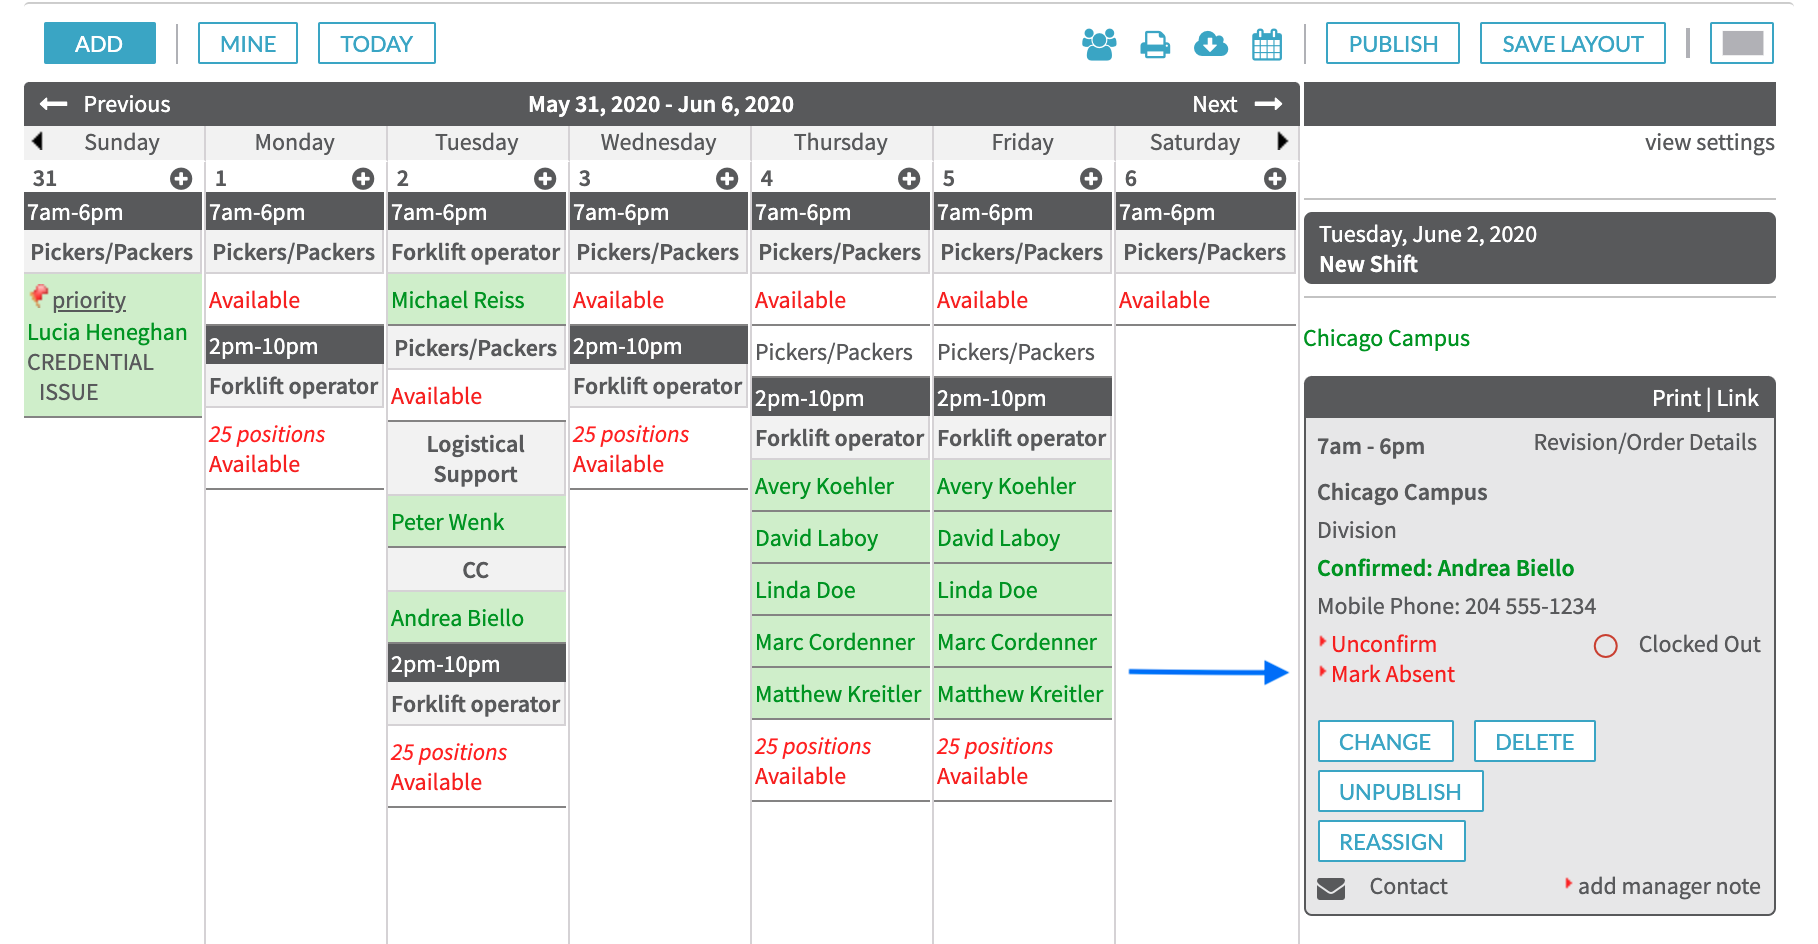
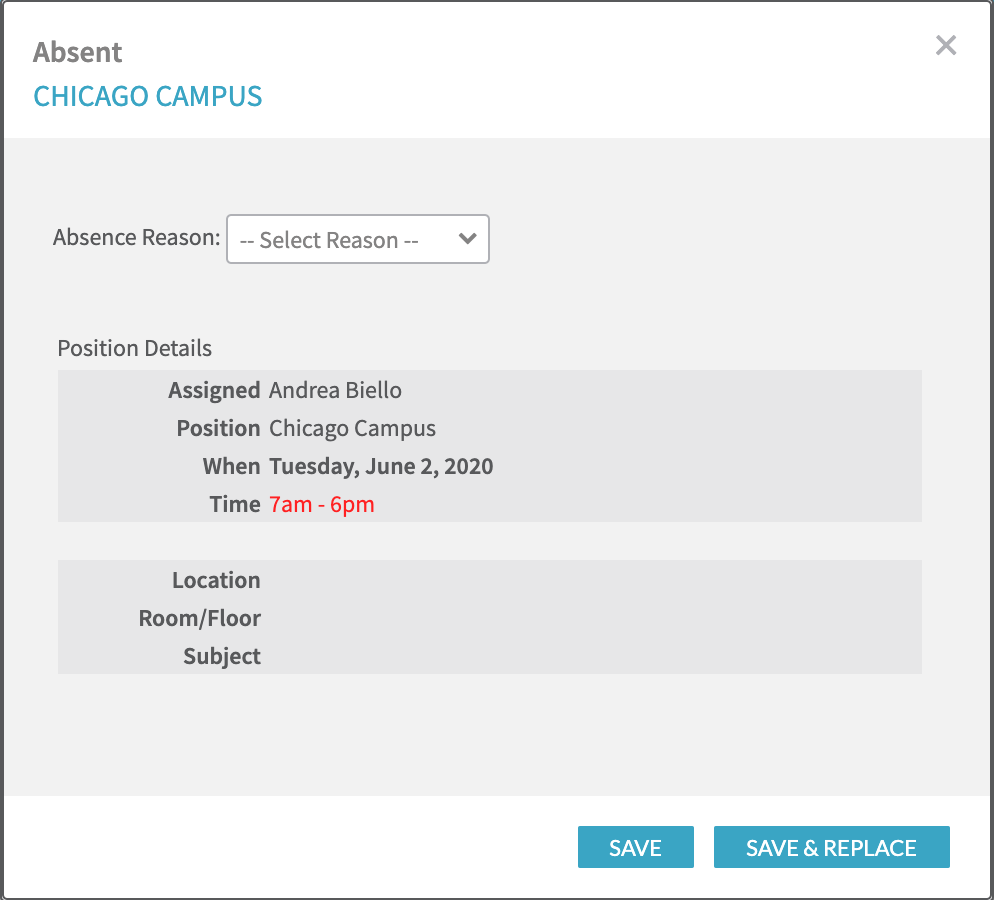
Once you click this, a box will appear where you can select the reason you'd like to associate with this absence, and click 'Save' to continue without creating a new shift, or click 'Save & Replace' to create a copy of this shift to be assigned to someone new.
Absences as Drafts
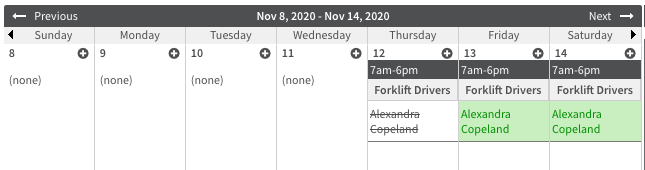
If you chose to update the setting to absent shifts automatically marked as drafts, the shift will change from a green, confirmed shift, to a black unpublished shift. The employee name will also have a strikethrough for a quick visual representation of the absence.
Absence Report
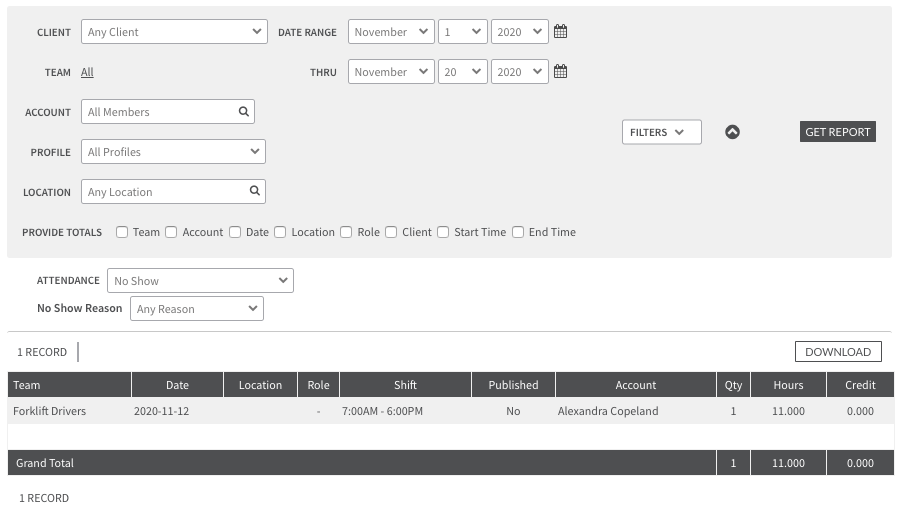
You are able to run a report on absences as well as the corresponding reasons for the absences if reasons are enabled. To access this report, click the Report Icon > Shifts > Shift Schedules. On this screen, fill in the date range that you would like the report to pull information for. Then, click the filter dropdown and select attendance. An additional box will appear with an attendance dropdown. In the dropdown, select No Show. If you'd like, you can even filter for absences based on specific absence reasons. Once ready, click Get Report. The information that appears is just an overview of the report information. For full details, click the download button to export a copy of the report.