Team Roles
Roles are ways for Managers to let members know that a specific skill or set of skills is required to work a shift. They can be used to restrict who can be assigned or who can pickup shifts.
How to Set Up Roles
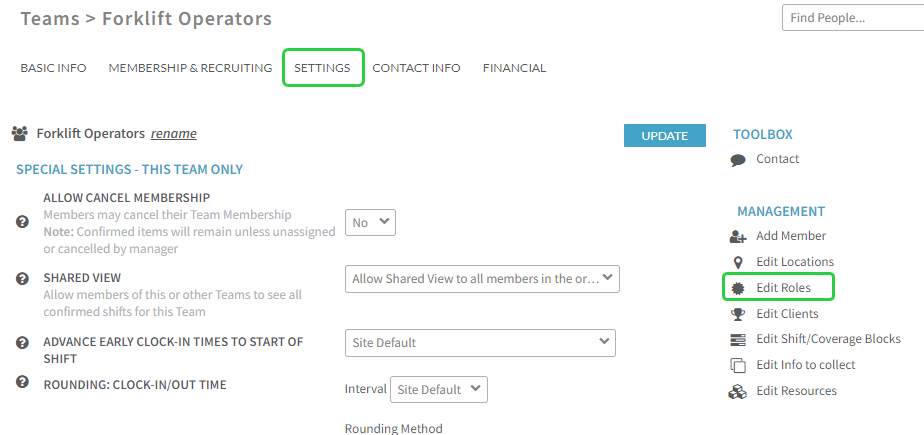
Setting up roles needs to be done by a Site Administrator. A site wide list of roles can be added by going to Settings > List Settings > Roles. Each team will need to have relevant roles added by going into the team, selecting Settings, then Edit Roles:
Enable Roles for Your Site
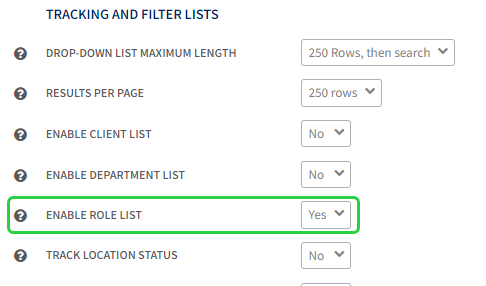
The settings for turning on roles can be found in two areas. First go to Settings > General Settings > Track/Filter Lists > Enable Roles and change to Yes.
Next go to Application Settings > Schedules > Standard Policies: For All Teams > Display Role Options and change to Yes:
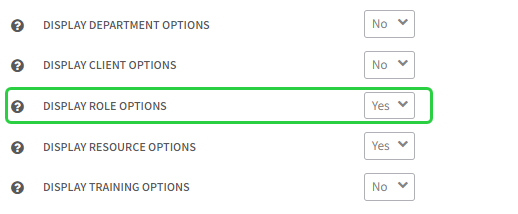
Roles will now be visible on the shifts.
Enable Roles for a Team
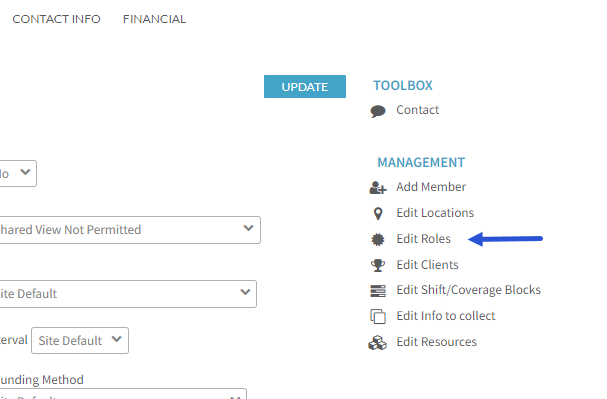
Roles can be controlled on a team-by-team basis. To use Role Restrictions for a team, go to the team, select Settings, and update Role Restrictions to Yes.

Next select Edit Roles on the right hand side:
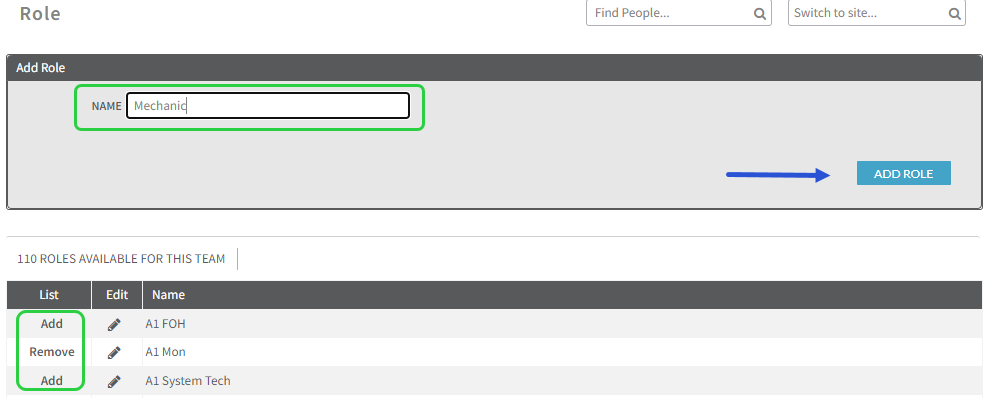
Add existing roles, remove unnecessary roles, or create new roles for that team:
Enable Roles for Team Members
Once the roles have been added to teams, you will see a role link next to all of the team members. Click it to assign roles to individual members.

Additional Information
The Customer Success team can help with the creation and assignment of roles in bulk via an upload. Please contact Support with any questions.